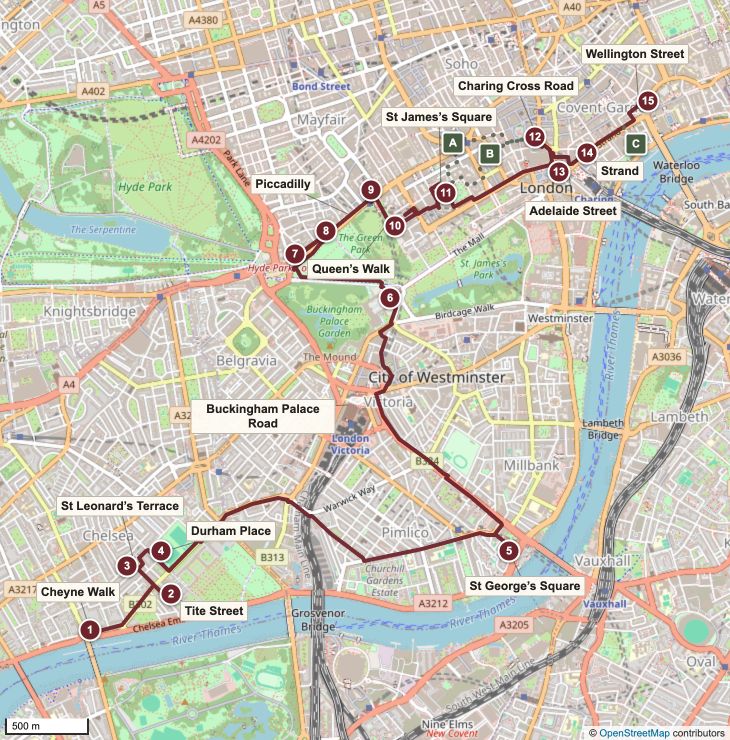
Follow Bram Stoker from home to work: from his Chelsea houses beside the Thames to the Lyceum Theatre, the centre of his working life with Henry Irving. Along the way, pass the homes of friends such as Oscar and Constance Wilde, his bank, the places where he dined after the theatre, the library where he researched, and the London street and park where he set part of Dracula. Bram managed Irving’s business for 27 years; their company was based at the Lyceum until 1902.
Each stop is marked with the thread of Bram’s life it belongs to: Home, Friends, Dining, Bank, Dracula or Work.
Approximate length
Allow
Underfoot
Start / finish
Full walkAbout 7.2 km / 4.5 miles
About 2 hours walking or half a day with stops
City pavements; busy road crossings
Near 26–27 Cheyne Walk → Lyceum Theatre, Wellington Street
Shorter walkAbout 3.5 km / 2.2 milesWest End only · stops 5–15
If Maps cannot use your location, enter a starting point there. To walk between two tour stops, use the next-stop links in the guide below. Your maps app may suggest a different route from this guide.
Begin beside the Thames, at the Chelsea home Bram shared with his wife Florence and son Noel. From this domestic setting, our walk follows the streets towards the theatre that shaped his working life. Family recollection has Bram walking to work on some days or taking a boat along the Thames.
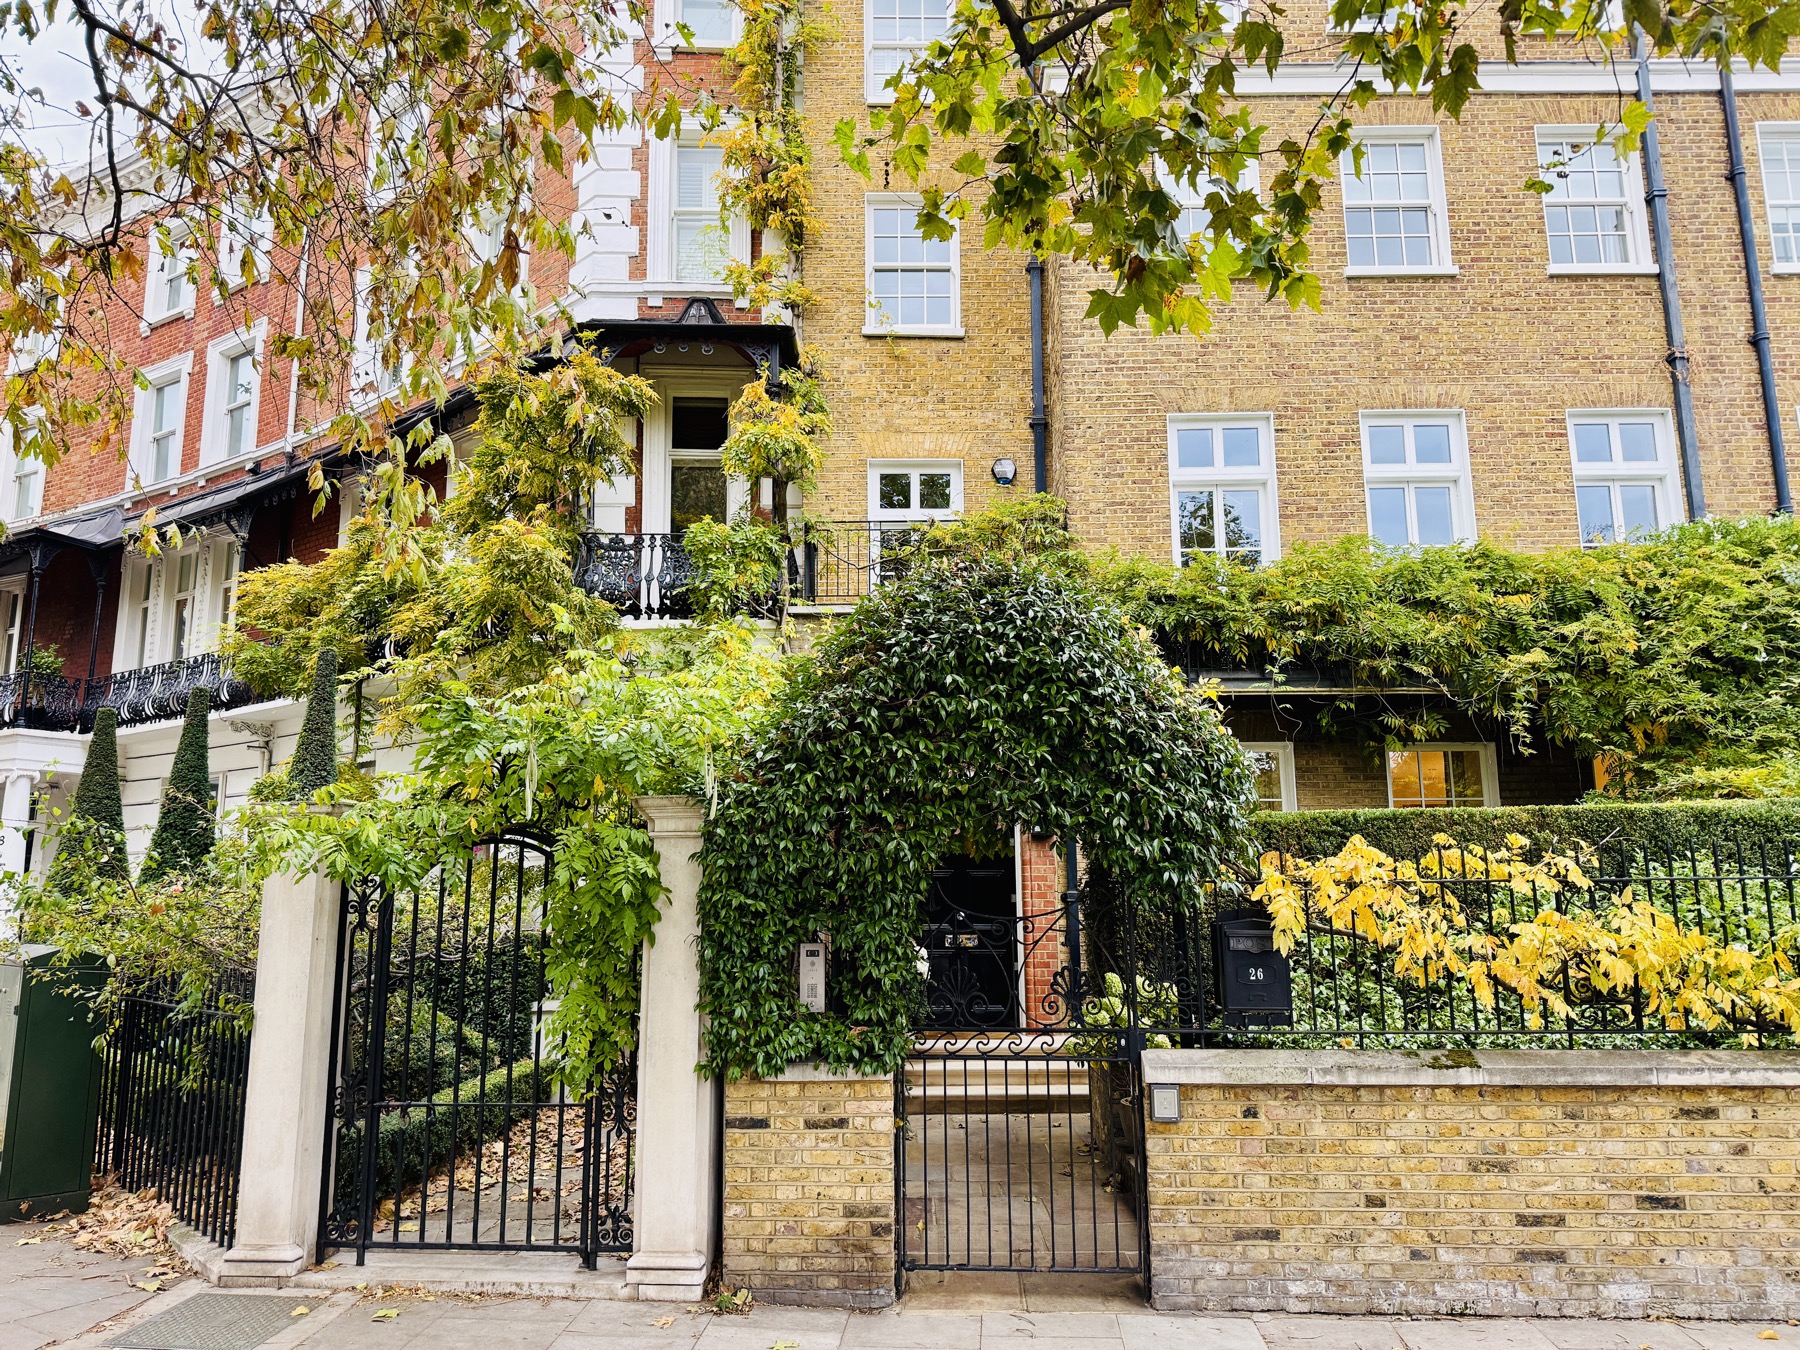
Stand on the north-bank pavement and look across the road to the Thames. Bram, Florence and their young son Noel moved to this riverside terrace in about 1881, three years after Bram joined Henry Irving’s company at the Lyceum.
Noel later recalled his father’s attempt to rescue a man from the river, an act recognised by the Royal Humane Society. Newspaper reports and the medal record the episode, and its difficult aftermath stayed in the family’s memory of this house.
The house also welcomed friends from Irving’s world, among them the poet Tennyson’s family. From this riverside home, our walk follows Bram through Chelsea and onwards to his working London.
Look for
The terrace facing the river, its doorways and railings, and the Thames opposite. The photograph shows the entrance to No. 26.
Read
“My wife and I lunched with them; and their sons, Hallam and Lionel, spent Sunday evenings in our house in Cheyne Walk.”
Evidence
Bram’s memoir confirms a family house in Cheyne Walk, documented by 1882. Most accounts give No. 27 from about 1881; Noel’s recollection gives No. 26. The exact doorway and the full residence period are not established.
Practical information
Private houses: view from the public pavement. Stay on the Chelsea (north) bank.
Walk to the next stop With the river on your right, walk east along Cheyne Walk. Follow Royal Hospital Road, then turn right into Tite Street. Continue to No. 34, Oscar and Constance Wilde’s former home.
27 Cheyne Walk – by the riverPhotograph: Jessica. Courtesy of the Bram Stoker Estate
Stop 2 of 15
34 Tite Street – Oscar and Constance Wilde’s home
Friends · The Wildes’ family home · 1884–1895
A short walk from Bram’s home brings us to Oscar and Constance Wilde’s house. Their story places Bram and Florence within a close, sometimes complicated circle of friendship.
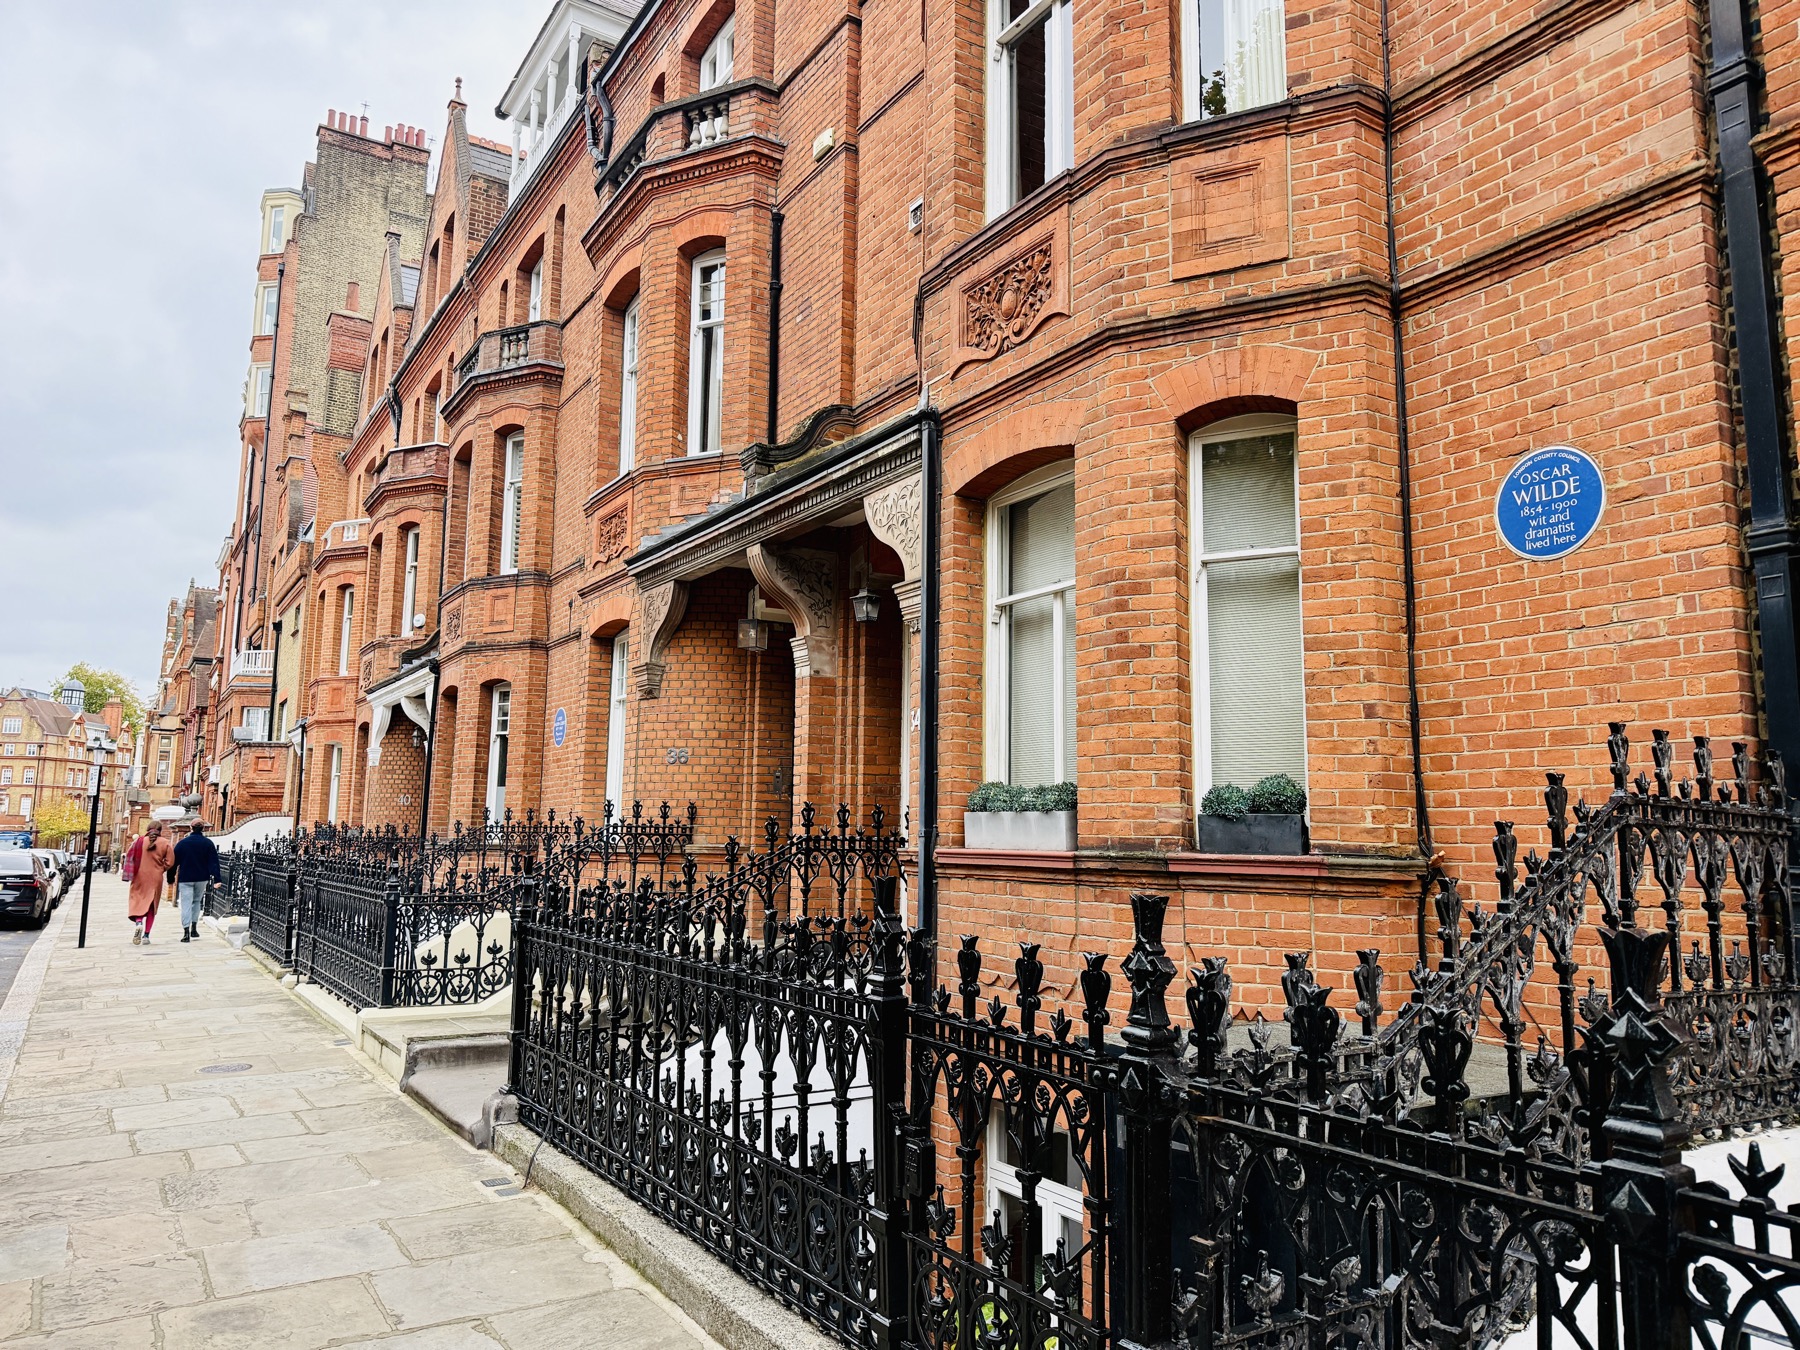
Look for the blue plaque at No. 34, originally 16 Tite Street. Oscar and Constance Wilde made their family home here from 1884 to 1895. Their sons Cyril and Vyvyan were born in 1885 and 1886.
Constance wrote children’s stories and campaigned for women’s rights and practical dress. The house places her work and family life alongside Oscar’s literary career.
Later, at the Adelaide Street memorial, we return to Oscar’s friendships with Florence and Bram. Here the story belongs to the home and the family who lived in it.
Look for
No. 34 and the blue plaque for Oscar Wilde. Remember Constance’s work and the family life behind the frontage.
Evidence
The house was originally 16 Tite Street and is now No. 34. Historic England records Oscar Wilde’s residence here from 1884 to 1895. The blue plaque commemorates Oscar; Constance’s writing and campaigning are documented by the National Portrait Gallery.
Practical information
Private house: view the plaque from the public pavement and keep the entrance clear.
Walk to the next stop Continue north along Tite Street. Turn right into Christchurch Street, then left into Ormonde Gate. Follow it to Durham Place and No. 4. The supplied photograph shows the upper floors; building work may obscure the ground floor.
34 Tite Street – Oscar and Constance Wilde’s homePhotograph: Jessica. Courtesy of the Bram Stoker Estate
Stop 3 of 15
4 Durham Place – Chelsea
Home · Bram’s address · by 1906 to 1911
Before turning towards St Leonard’s Terrace, pause at the later home from which Bram asked the Royal Literary Fund for help. His letter reveals the uncertainty behind the fame that Dracula would eventually bring.
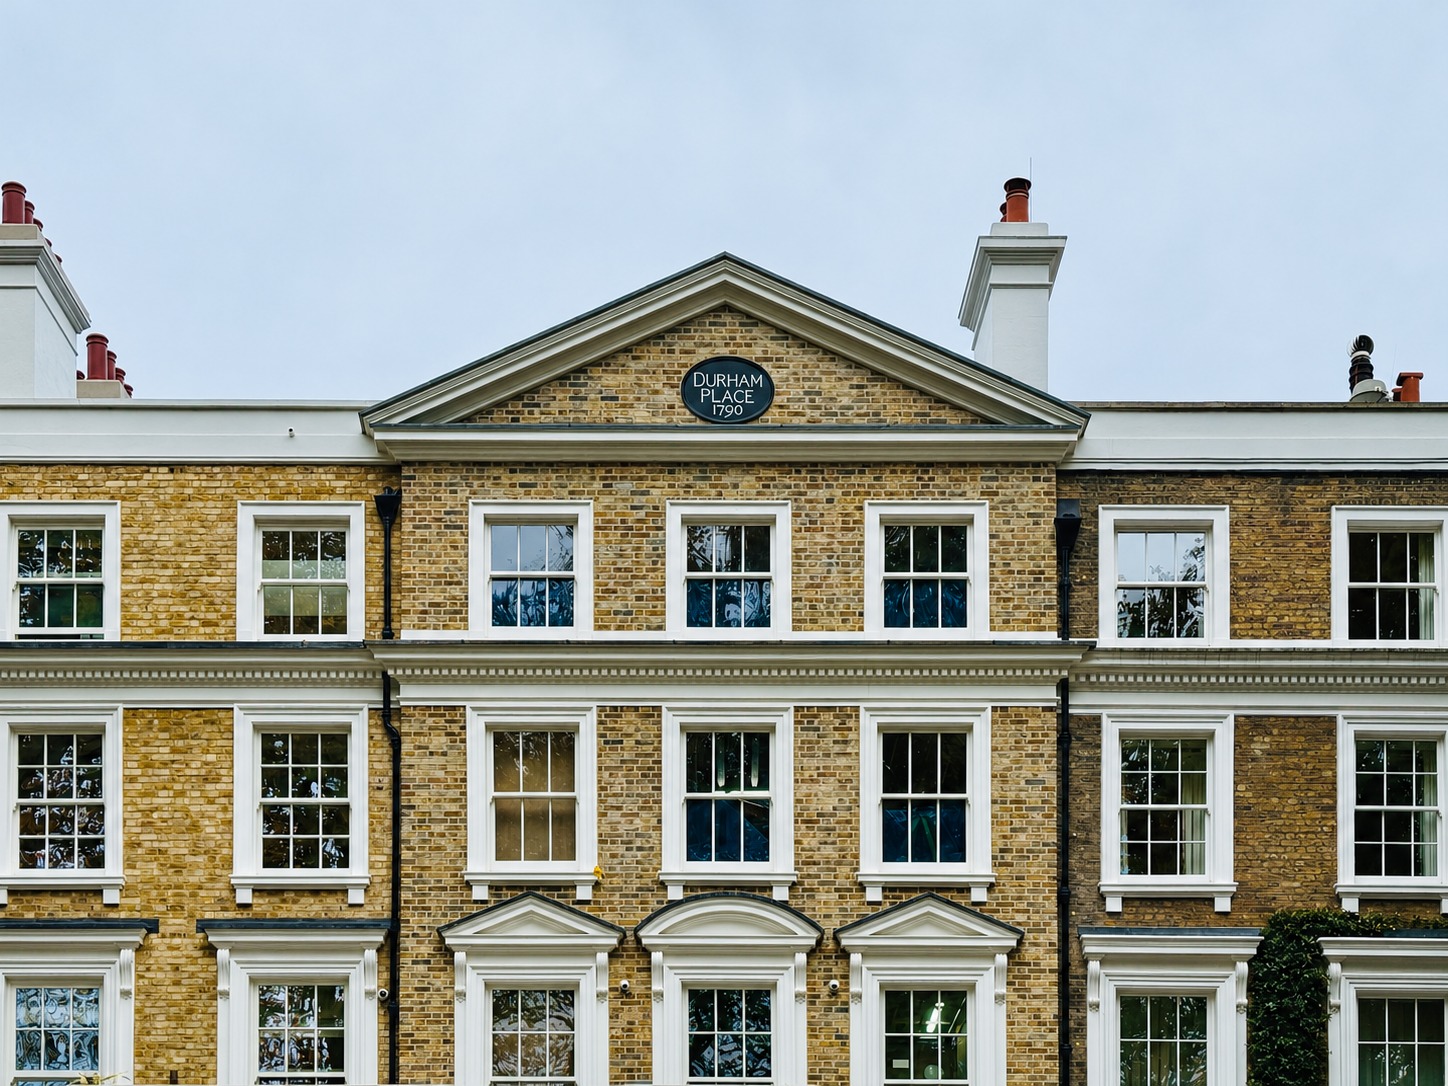
Look along Durham Place, a short Chelsea street of private houses. The preface to Bram’s Personal Reminiscences of Henry Irving, published in two volumes in 1906, ends with this address. Irving had died the year before, and the book records their long partnership.
On 25 February 1911 Bram wrote from here to the Royal Literary Fund, describing how illness had restricted his ability to earn. The Fund awarded him £100, and his signed receipt is dated 9 March 1911.
This address holds two sides of Bram’s last years: the devoted biographer of his friend and a working writer under financial pressure. Later in 1911 he moved to St George’s Square in Pimlico, where he died in 1912.
Look for
The modest terrace fronts and doorways of Durham Place. Look for No. 4 among the house numbers; modern alterations and current works may change the view.
Read
“Let any one who will read the book through say whether I have tried to do him honour – and to do it by worthy means”
Evidence
The 1906 preface and the 1911 letter both give this address, so Bram was here from at least 1906 to February 1911. His exact moving-in and moving-out dates have not been established.
Practical information
Private homes. The photograph shows the upper floors; keep to the public pavement.
Walk to the next stop Continue along Ormonde Gate to St Leonard’s Terrace and turn right. Look for the white house and Bram Stoker plaque at No. 18, beside the southern end of Royal Avenue.
The upper floors of 4 Durham Place.Photograph: Richard. Courtesy of the Bram Stoker Estate · AI edited: straightened and cropped; original retained in the Estate collection.
Stop 4 of 15
17–18 St Leonard’s Terrace – Bram’s Chelsea homes
Home · Family homes · No. 17 about 1884–86; No. 18 about 1896–1906
Here, the blue plaque brings Bram’s life as a neighbour and novelist into view. The Stokers lived at Nos. 17 and 18, and much of his work on Dracula belongs to these Chelsea years.
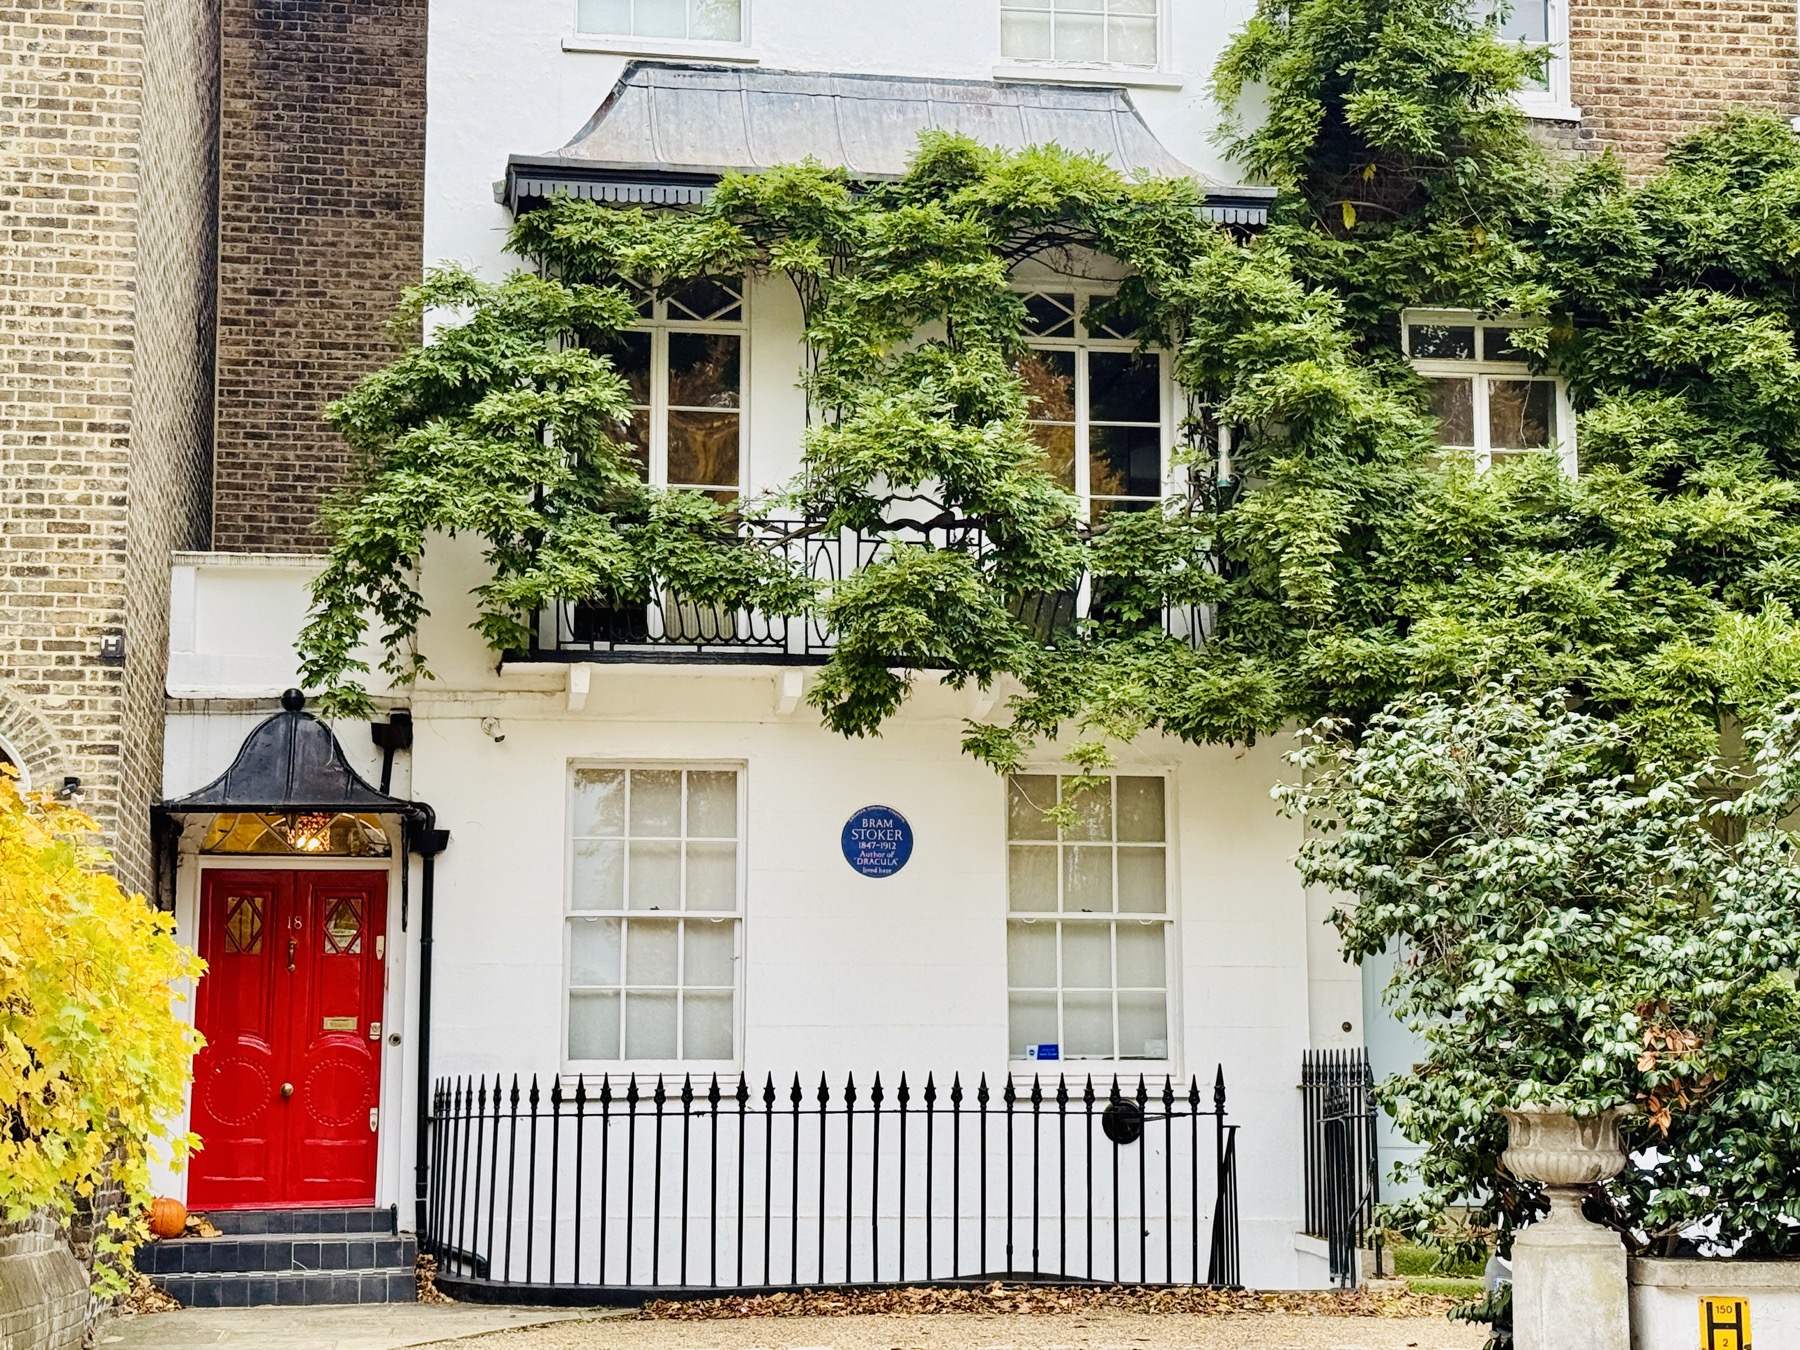
Look up at the blue plaque on No. 18. The Greater London Council put it up in 1977, and it names Bram as the author of Dracula.
The family moved into No. 17 in about 1884 and later lived next door at No. 18, from about 1896 to 1906. Much of Bram’s work on Dracula, published in 1897, belongs to these Chelsea years. From this street he went out to research at the London Library and to earn his living at the Lyceum, both later on this walk.
The Lyceum could reach him here at any hour. Before dawn on 18 February 1898 a cab-driver knocked with a letter from Bow Street police station: the Lyceum’s scenery store in Southwark was on fire.
Look for
The blue plaque on No. 18 and the house numbers on both doors. Photograph plaque and numbers together so the neighbouring addresses stay distinct.
Read
“At ten minutes past five on the morning of Friday, 18th February 1898, I was wakened by a continuous knock at a door somewhere near my house in Chelsea.”
Evidence
The 1977 plaque records Bram’s residence but gives no dates. The house numbers and years rest on directory evidence and are approximate; census returns would settle them. Bram’s 1898 account names only “my house in Chelsea”.
Practical information
Private houses: view the plaque from the pavement.
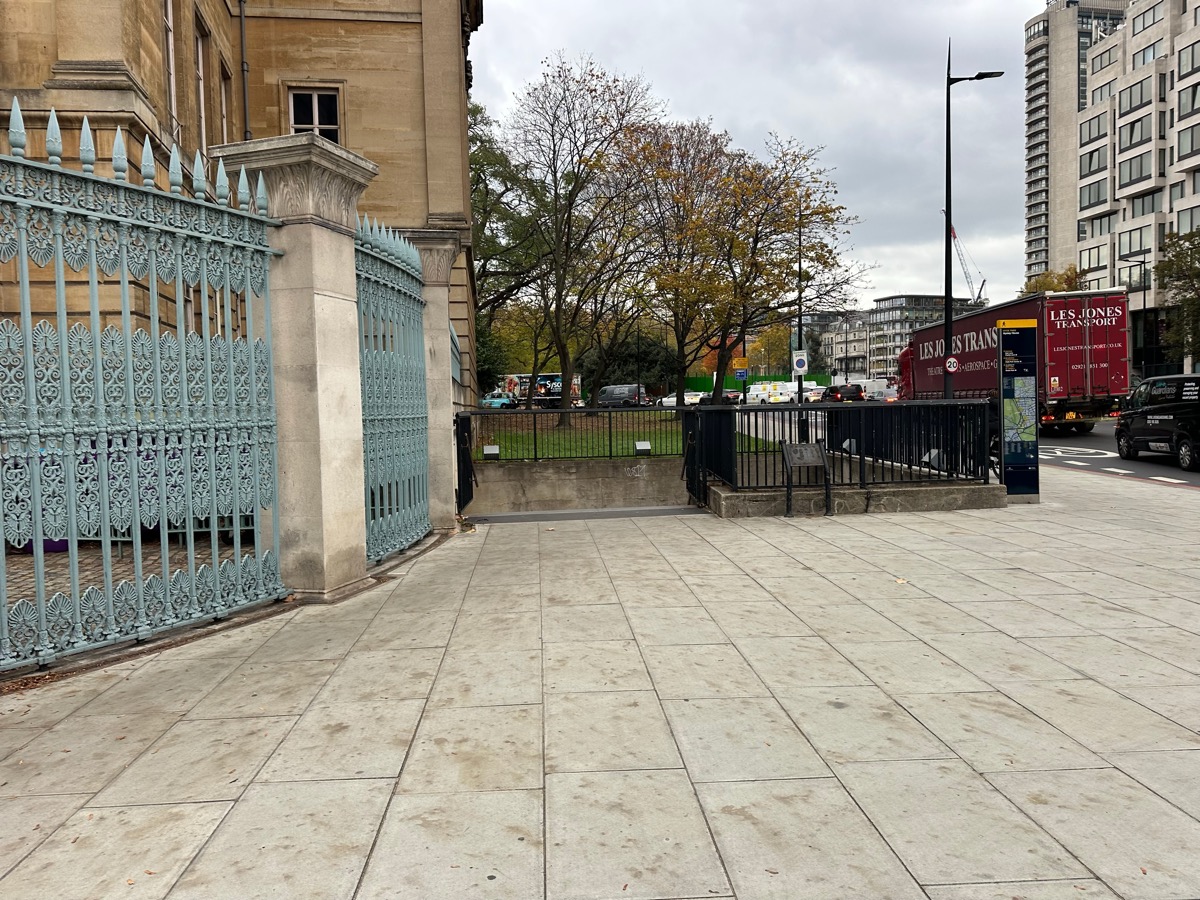
Walk to the next stop Walk up Royal Avenue to King’s Road and turn right. At Sloane Square, use the marked crossings at the western end of the square to reach Sloane Street. Follow Sloane Street north to Knightsbridge, then turn right towards Hyde Park Corner. Continue past Apsley House to the pedestrian underpass shown in the photograph, and follow the signs towards Piccadilly. The underpass has steps. Emerge on the north side of Piccadilly and continue east to No. 138.
On the way to stop 5: the pedestrian underpass beside Apsley House. Follow the signs towards Piccadilly.Photograph: Richard. Courtesy of the Bram Stoker Estate
17–18 St Leonard’s Terrace – Bram’s Chelsea homesPhotograph: Jessica. Courtesy of the Bram Stoker Estate
Stop 5 of 15
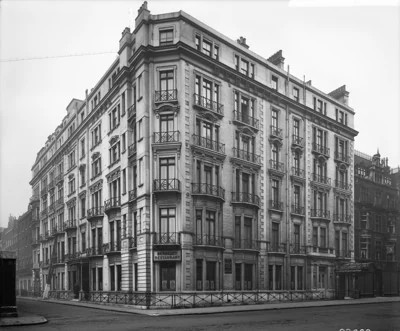
138 Piccadilly – the most likely location of Dracula’s London house
Dracula · Possible location · The Count’s 347 Piccadilly · Dracula, 1897
Start here for the shorter West End walk (about 3.5 km; allow 1½ hours plus visits).
After Chelsea’s homes, Piccadilly brings us into Dracula’s London – or at least the bit of London that inspired part of Bram’s writing. The novel places the address as No. 347, but Piccadilly’s numbering does not go that high. No. 138 is the strongest candidate for the Count’s house, although the identification remains a research question.
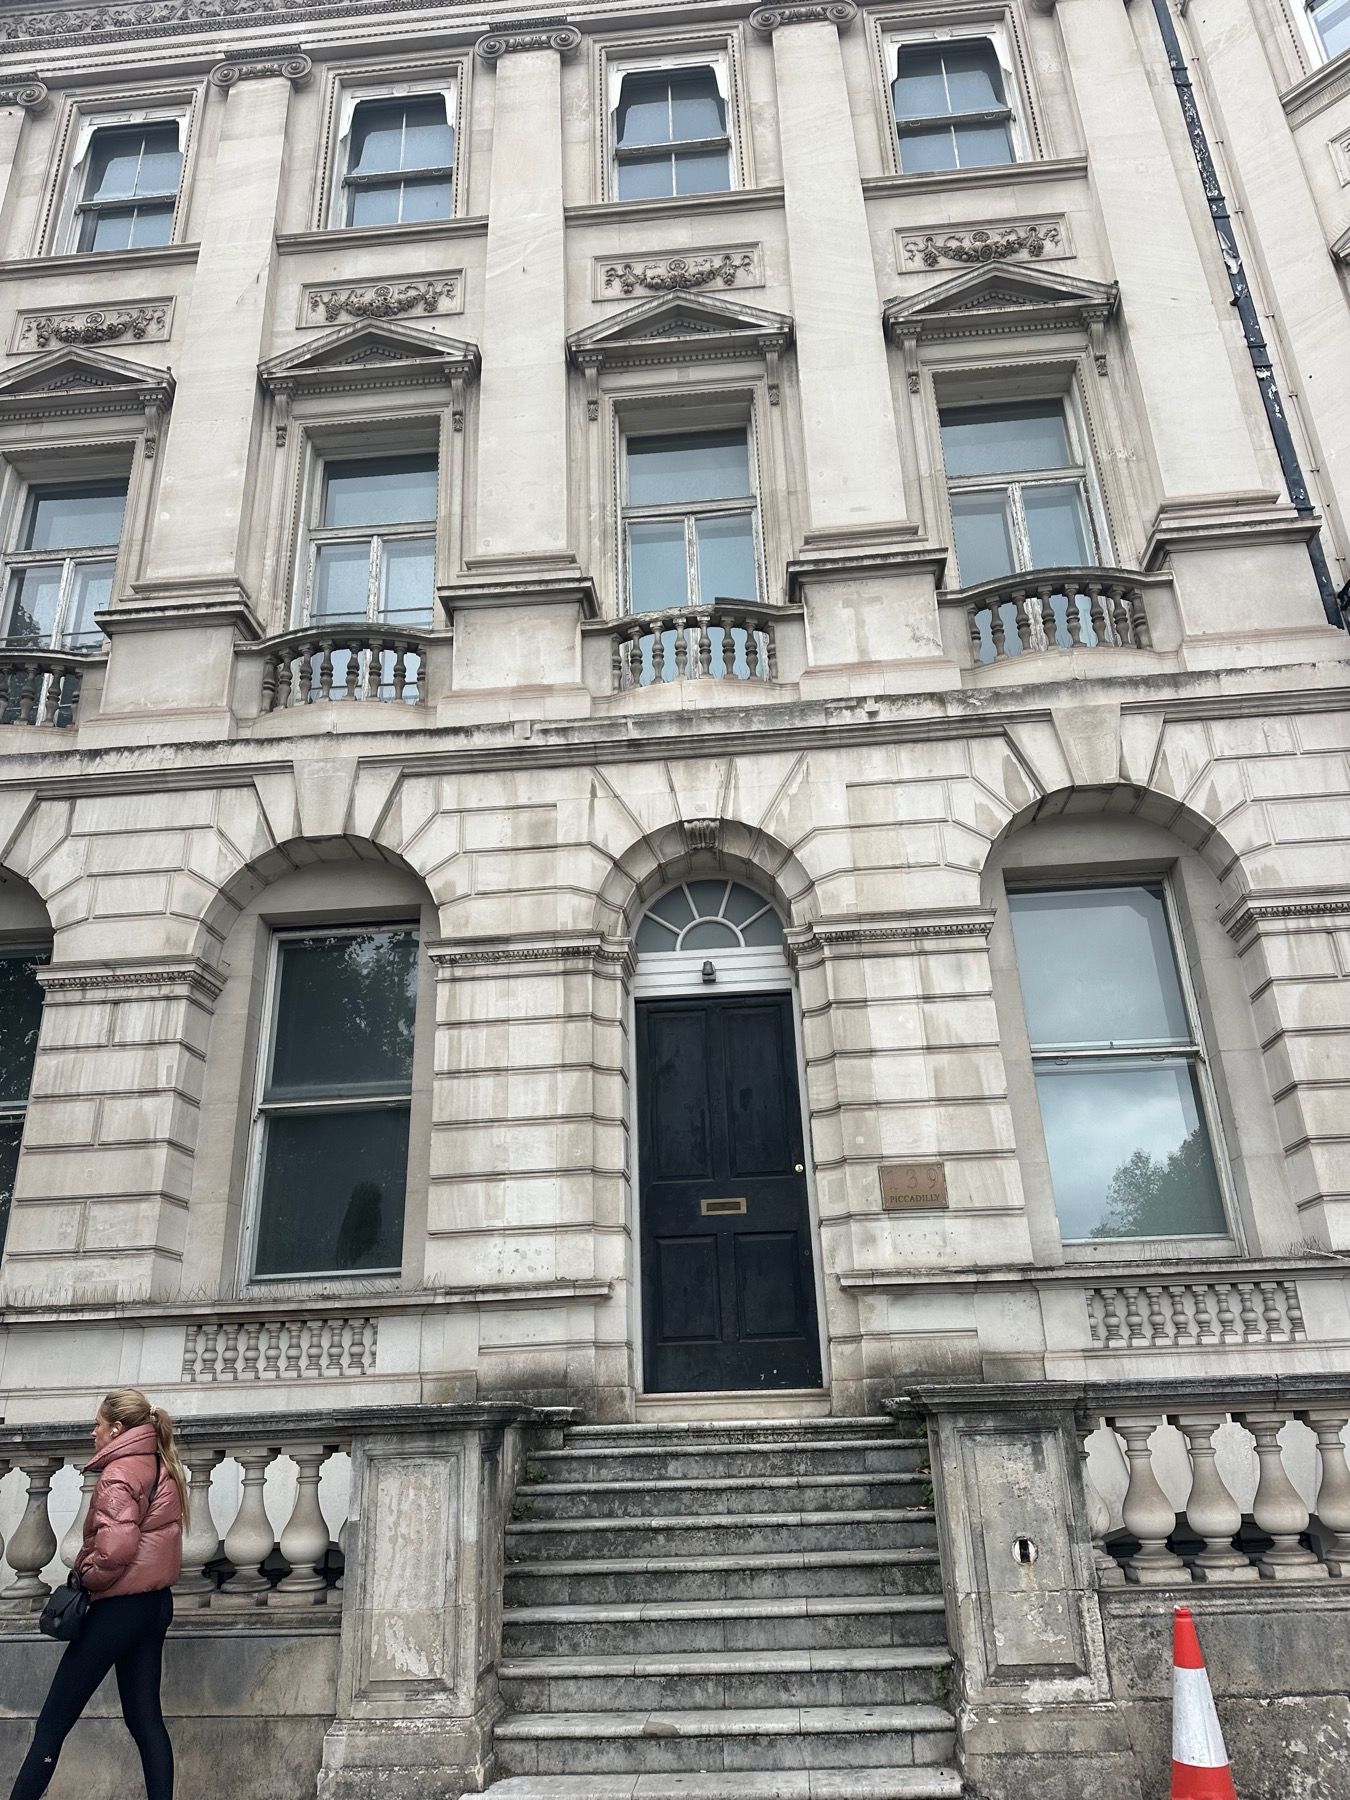
Look at No. 138 on the north side of Piccadilly, near Old Park Lane. Researchers have compared this row with the Count’s fictional house at 347 Piccadilly, which Jonathan tracks down in Chapter 20. He finds it dusty and shuttered, with a torn-down notice-board in front of the balcony. Currently No. 139 fits that picture better!
Historic England dates the present refacing of No. 138 to 1891, the years when Bram was developing the novel. Its stone front, canted bay, raised entrance and balcony invite comparison with Jonathan’s description.
Chapters 22 and 23 add a harder architectural test: a rear dining room, a lower stone-paved yard, a stable and an escape into a mews. As you walk east, compare No. 128 and the site of No. 107, two alternative proposals for the same house.
Look for
The stone front of No. 138, its canted bay, raised entrance and first-floor balcony. Then, walking east, No. 128 and the site of No. 107.
Read
“We beg, with regard to the desire of your Lordship, expressed by Mr. Harker on your behalf, to supply the following information concerning the sale and purchase of No. 347, Piccadilly. The purchaser is a foreign nobleman, Count de Ville, who effected the purchase himself paying the purchase money in notes ‘over the counter,’ if your Lordship will pardon us using so vulgar an expression.”
“The windows were encrusted with dust, and the shutters were up. All the framework was black with time, and from the iron the paint had mostly scaled away.”
Evidence
No. 347 is fictional. No. 138 is a later proposal, not a proved identification, and a similar frontage is only part of the evidence. Nos. 128 and 107 are alternative suggestions.
Practical information
Exterior street stop. Use public pavements and crossings, keep entrances clear and stay out of private yards.
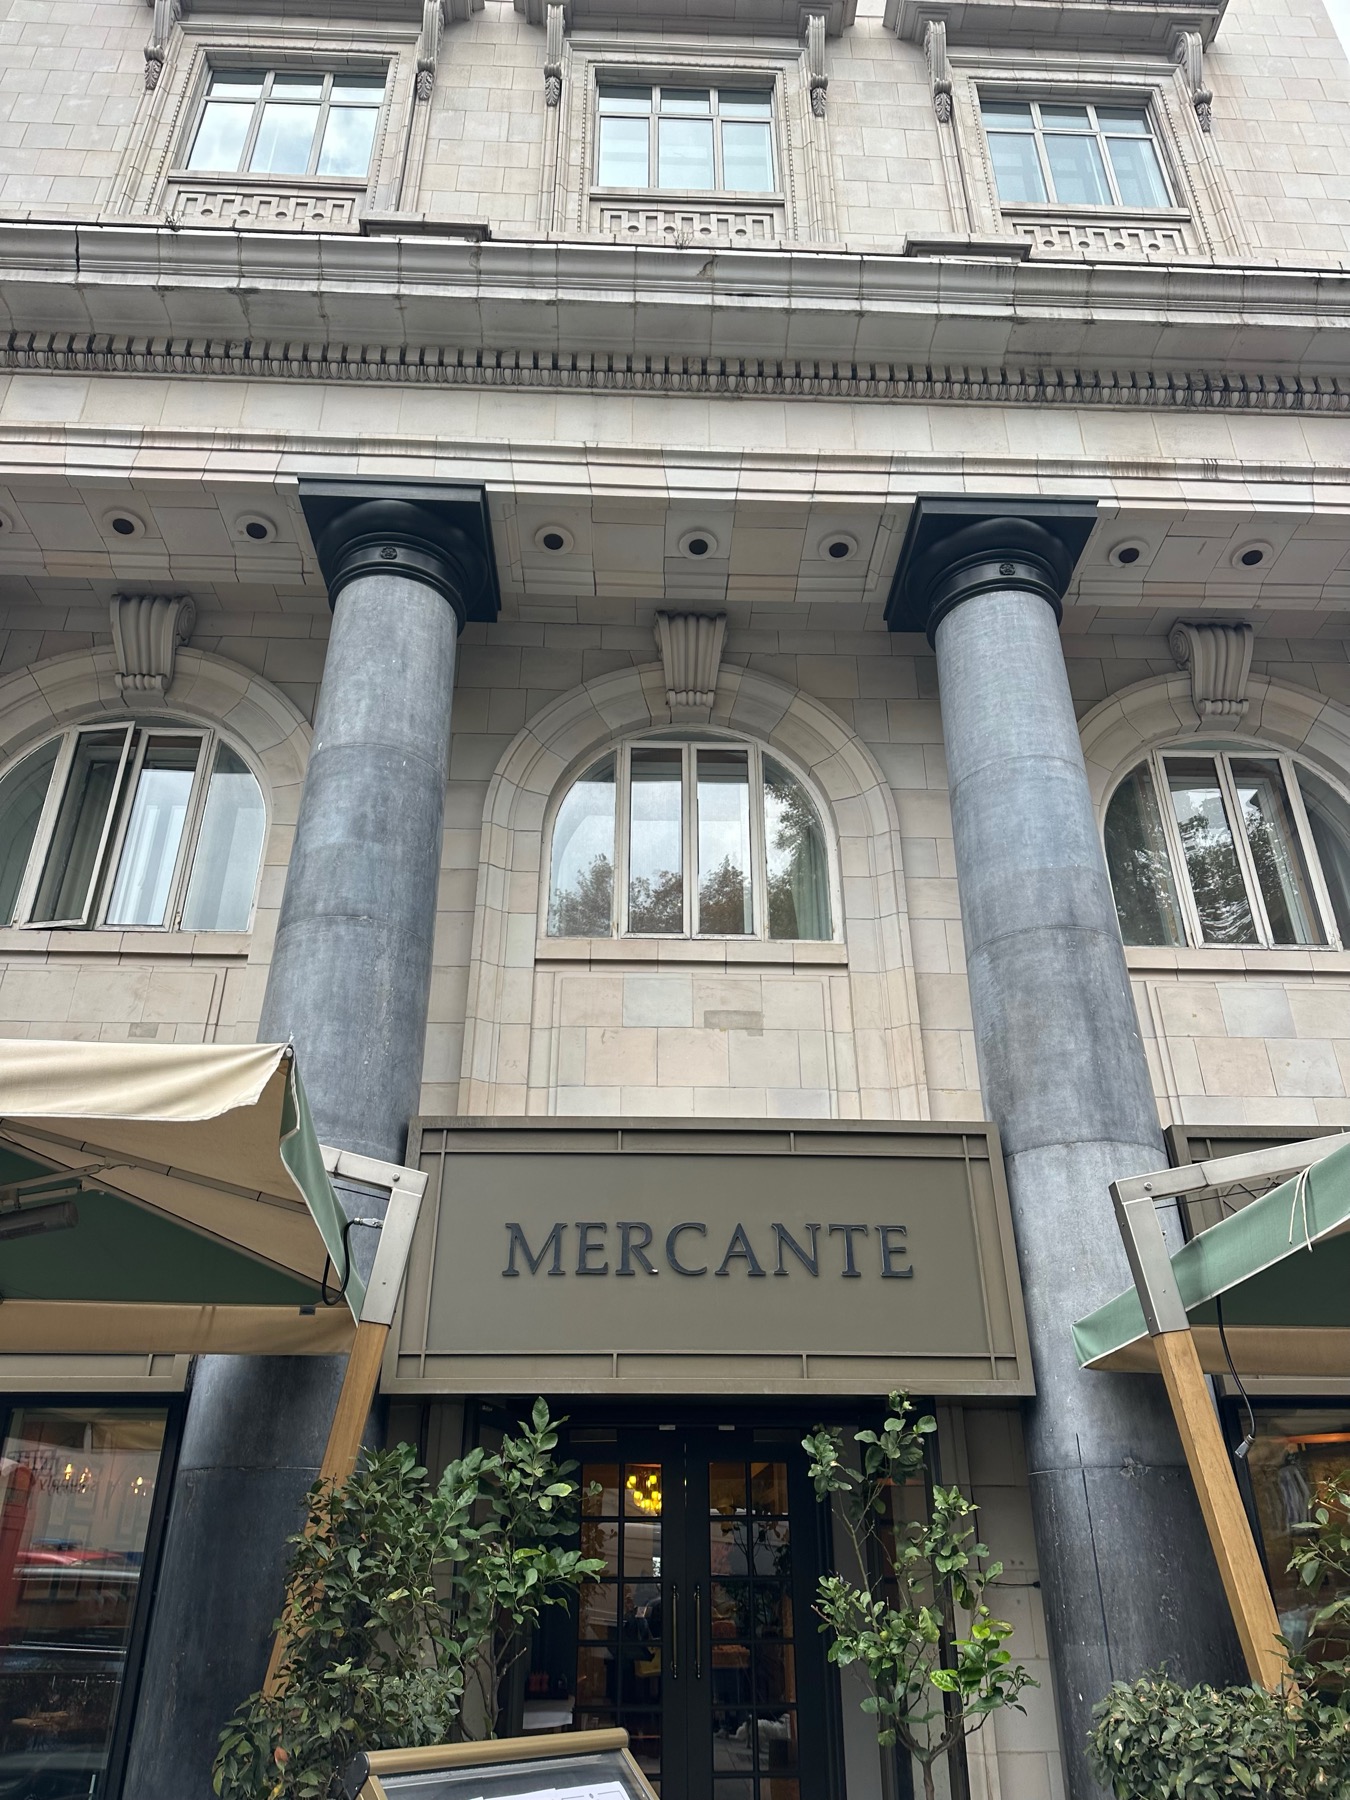
Walk to the next stop Keep walking east along the north side of Piccadilly to No. 115, the former Giuliano premises. You will pass the RAF Club at No. 128 on the way; it is a comparison frontage rather than a separate stop.
Dracula · Fictional use of a real location · Mina’s journal, 22 September · Dracula, Chapter 13
Continue along Piccadilly to the former site of Carlo Giuliano’s jeweller’s shop. Bram placed a moment of recognition here: Jonathan Harker sees the Count in a crowded London street.
Look along Piccadilly to No. 115, where Carlo Giuliano’s jewellery shop once stood. In Chapter 13, Mina and Jonathan walk down Piccadilly from Hyde Park Corner arm in arm, after Mr Hawkins’s funeral.
Mina is admiring a beautiful girl in a carriage outside the shop when Jonathan suddenly clutches her arm. He has recognised the tall, thin man with a beaky nose and pointed beard who is watching the same girl: it is Dracula.
The girl drives off up Piccadilly, and the Count follows and hails a hansom. Shaken and pale, Jonathan lets Mina lead him away to rest in Green Park, a later stop on this walk. The novel spells the shop’s name “Guiliano’s”.
Look for
The building at No. 115 and the busy Piccadilly kerb, where the victoria waited and the Count hailed his hansom.
Read
“I was looking at a very beautiful girl, in a big cart-wheel hat, sitting in a victoria outside Guiliano’s, when I felt Jonathan clutch my arm so tight that he hurt me…”
“I believe it is the Count, but he has grown young.”
Evidence
Giuliano’s shop at 115 Piccadilly was an actual location for a fictional encounter. The Victorian shop interior does not survive.
Practical information
View from public pavements; use marked crossings and respect private entrances.
Walk to the next stop Continue east along the same pavement to the corner of Berkeley Street. This is the site of the original Berkeley Hotel, Van Helsing’s London base in the novel.
The Piccadilly frontage near the former Giuliano premises.Photograph: Richard. Courtesy of the Bram Stoker Estate
Stop 7 of 15
The original Berkeley Hotel – Van Helsing’s London base
Dracula · Fictional use of real location · Van Helsing’s hotel in Dracula · 1897
Further along Piccadilly, a hotel address brings another of Bram’s fictional travellers into view. The Berkeley Hotel was Van Helsing’s London base.
Stand at the corner of Berkeley Street and Piccadilly, where the original Berkeley Hotel stood and where Dracula gives Van Helsing his London base. On 13 September Dr Seward calls for him here and finds the Professor ready, bag in hand.
The hotel serves the hunters again and again. In Chapter 15 Van Helsing summons Seward, Arthur and Quincey to meet him here at ten at night, and in Chapter 17 a telegram from Mina is waiting when the two doctors arrive. In Chapter 20 Jonathan finds the estate agents Mitchell, Sons & Candy in a directory here, then sets off for their office in Sackville Street.
Historic England holds a photograph of the hotel’s reception room dated 17 June 1897, only weeks after Dracula appeared – the kind of room in which Bram imagined the Professor waiting.
Look for
The corner of Berkeley Street and Piccadilly, with Berkeley Street running north. Sackville Street, Jonathan’s next call in Chapter 20, is an optional detour from here.
Read
“Called at the Berkeley and found Van Helsing, as usual, up to time. The carriage ordered from the hotel was waiting. The Professor took his bag, which he always brings with him now.”
“To-morrow night you will come to me to the Berkeley Hotel at ten of the clock. I shall send for Arthur to come too, and also that so fine young man of America that gave his blood.”
“Having learned the address of Mitchell, Sons, & Candy from a directory at the Berkeley, I was soon at their office in Sackville Street.”
Evidence
The corner marks the site of the original hotel; the novel describes none of its rooms. The Berkeley moved to Knightsbridge in 1972, so today’s hotel of that name stands elsewhere.
Practical information
View from public pavements; use marked crossings and respect private entrances.
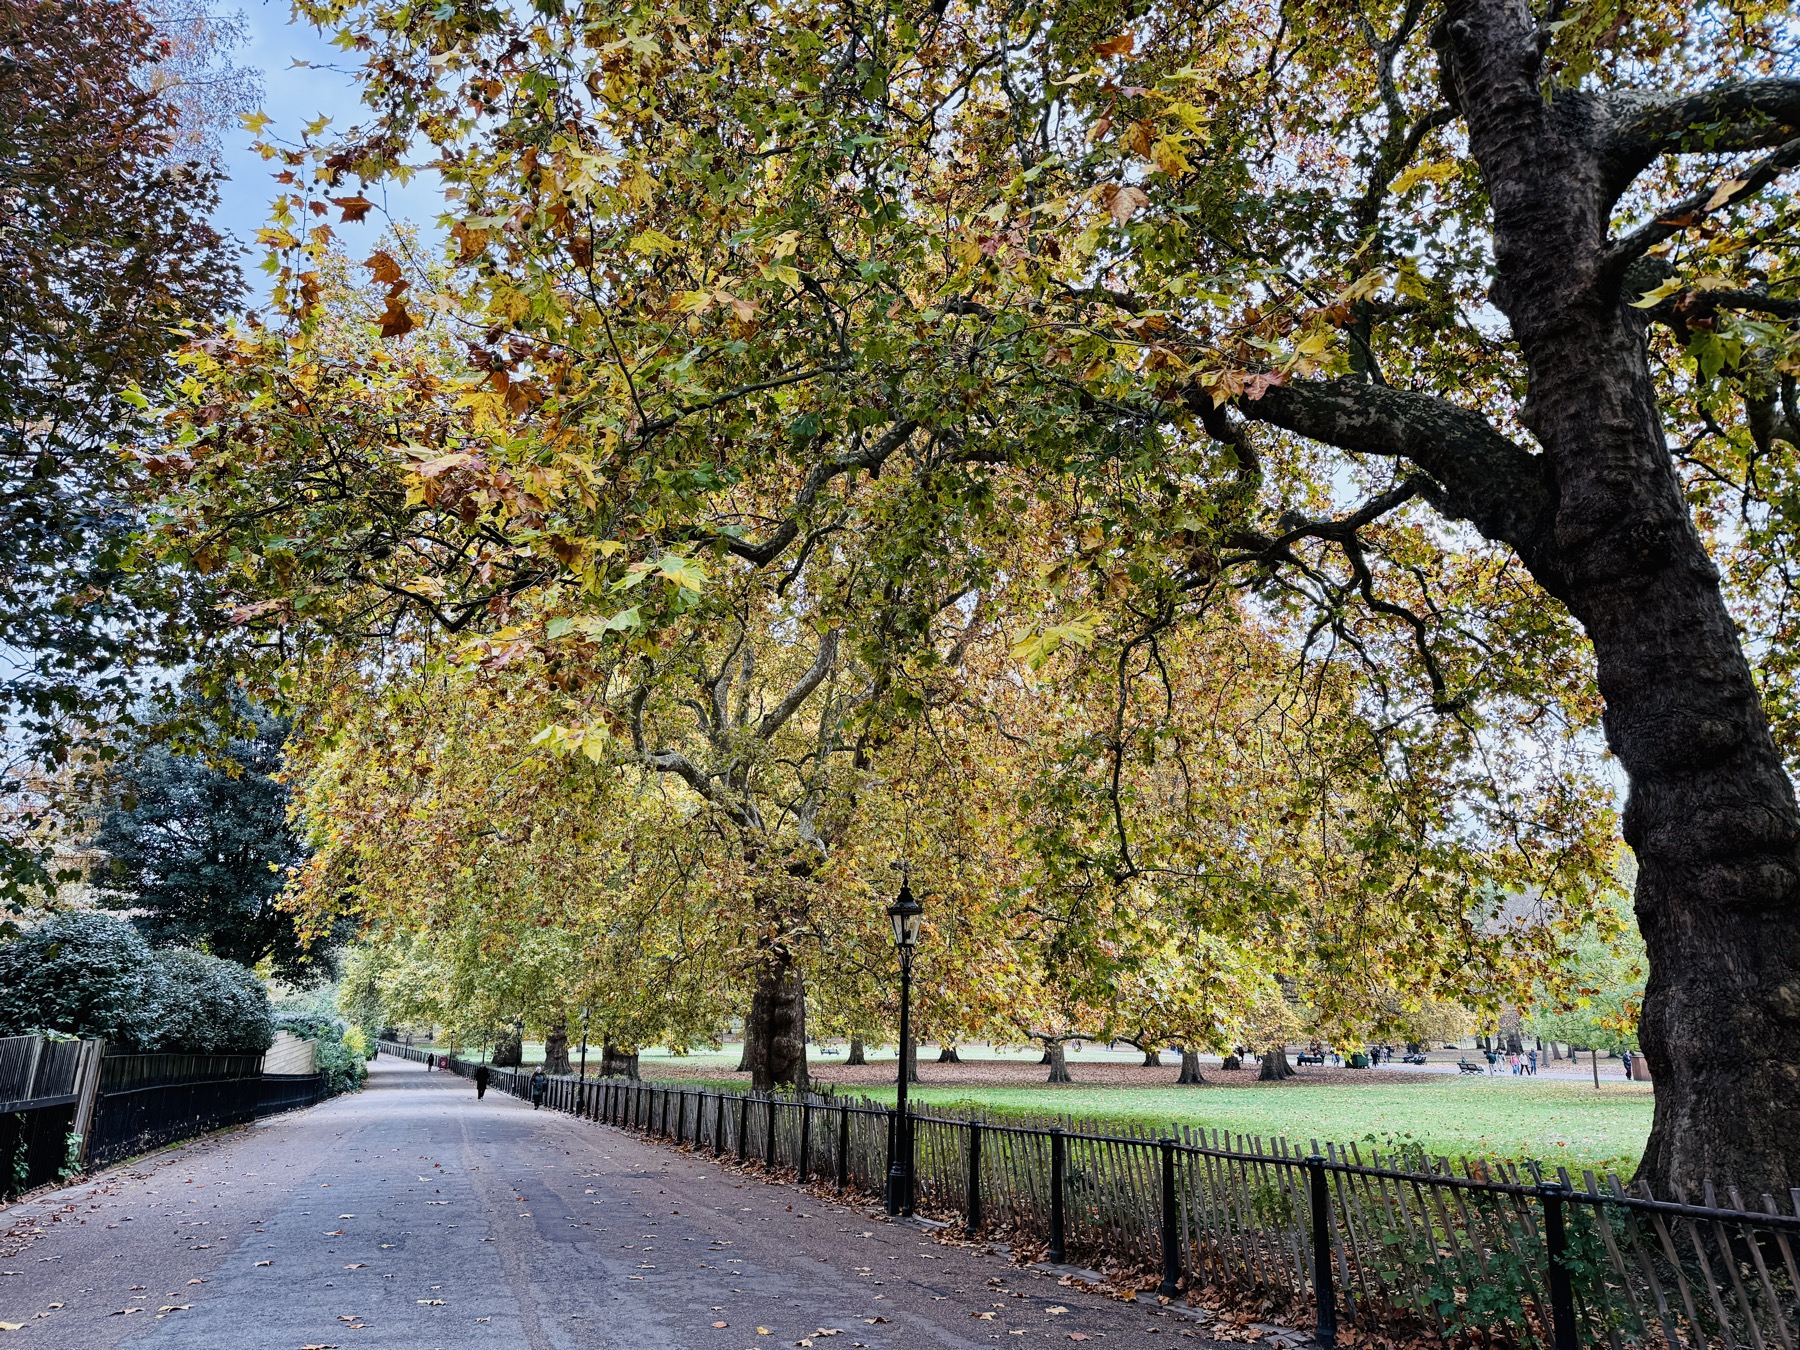
Walk to the next stop Use the marked crossing on Piccadilly to reach Green Park. Enter the park and follow Queen’s Walk south, with the backs of the buildings on your left. Pause along this path for Mina and Jonathan’s Green Park story.
Dracula · Fictional use of real location · Mina’s journal, 22 September · Chapters 13 and 22
Cross into Green Park and leave Piccadilly’s traffic behind. Bram gave Mina and Jonathan a moment of refuge among these paths after having seen Dracula, while the danger they had seen remained close by.
Find a seat in the shade along Queen’s Walk. After Jonathan recognises the Count outside Giuliano’s, Mina leads her shaken husband into Green Park, and on this hot autumn day he is soon asleep with his head on her shoulder.
Twenty minutes later he wakes, apologises for his rudeness and suggests a cup of tea, apparently with no memory of the encounter. Mina is left troubled, and her journal entry for 22 September turns a London park into a place of quiet dread.
The park returns in Chapter 22, when Jonathan, Seward and Van Helsing stroll in from Arlington Street and sit on a bench, smoking, with the Piccadilly house in view. They wait there while Godalming and Morris bring a locksmith to open its door.
Look for
Shady seats along Queen’s Walk, any of which could stand in for Mina’s. To the north lies Piccadilly, where the novel places the Count’s house within sight of the park.
Read
“We walked a little further, and then went in and sat for a while in the Green Park. It was a hot day for autumn, and there was a comfortable seat in a shady place.”
“After a few minutes’ staring at nothing, Jonathan’s eyes closed, and he went quietly into a sleep, with his head on my shoulder.”
“We sat down on a bench within good view, and began to smoke cigars”
Evidence
Dracula names Green Park, Arlington Street and a bench, but no particular entrance or seat. Queen’s Passage is this walk’s link towards Marlborough House, not a place in the novel.
Practical information
Park paths; use marked crossings at Piccadilly. If Queen’s Passage is closed, return to Piccadilly and use St James’s Street.
Walk to the next stop Continue south along Queen’s Walk to Milkmaid’s Passage, the public passage out of Green Park. Follow it to the St James’s area, then turn right along St James’s Street towards St James’s Palace. Turn left into Pall Mall and continue to the Marlborough House entrance. Follow local signs if a park gate is closed.
Green Park – Mina and Jonathan’s refugePhotograph: Jessica. Courtesy of the Bram Stoker Estate
Stop 9 of 15
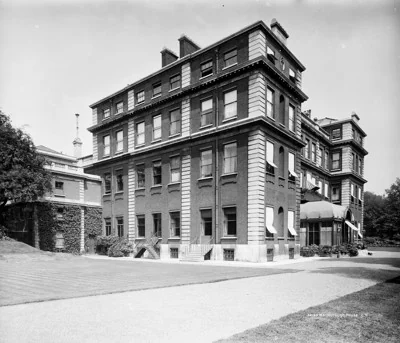
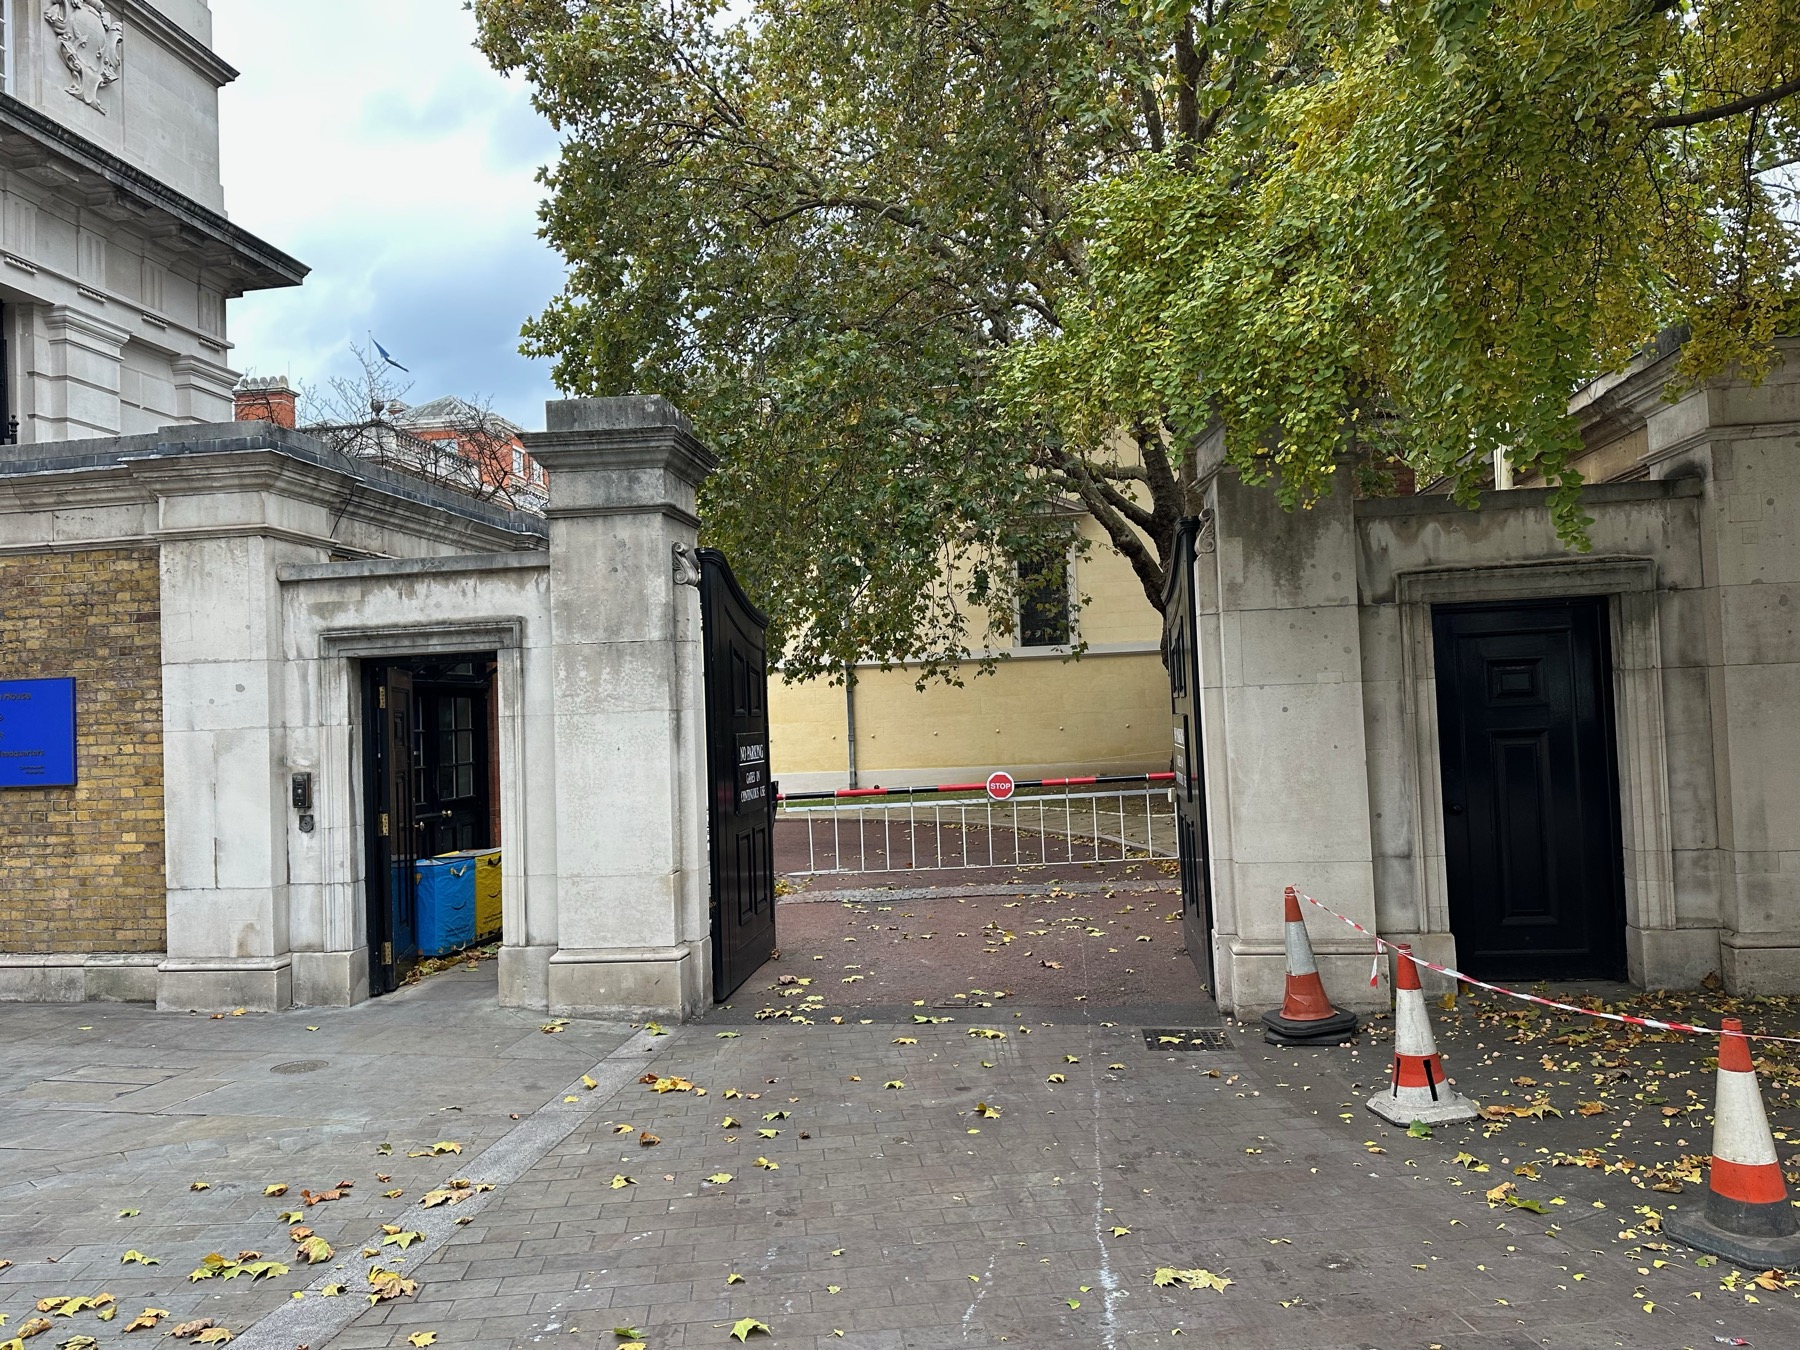
Marlborough House – Bram, Irving and the Prince of Wales
Dining · Supper on the Lyceum stage · 7 May 1883
Marlborough House brings us to the royal circle around Bram and Irving. The Prince of Wales lived here with Princess Alexandra before becoming King Edward VII in 1901.
For Bram, royal visitors meant practical work as well as prestige: invitations, hospitality and the careful organisation behind an apparently effortless evening at the Lyceum.
At the Lyceum, Henry Irving and Bram entertained distinguished guests in the Beefsteak Room, often over supper after a performance. Guests included William Gladstone, Sarah Bernhardt, Richard and Isabel Burton, the pianist Ignacy Jan Paderewski and the Prince of Wales.
When the Prince joined a group of fifty on 7 May 1883, the larger royal party needed the theatre’s stage, as the Beefsteak Room seated only thirty-six. Chandeliers hung beneath a great tent-roof, crimson curtains surrounded the diners, and a quartet played behind palms and flowers.
At the centre of the round table lay a low mass of yellow flowers, kept to nine inches high so that guests could see one another.
According to family recollection, the Prince of Wales also gave Bram a gold pen and pencil set.
Look for
The Marlborough House entrance and identifying signs on Pall Mall. The royal supper in this account took place on the Lyceum stage, our final stop, rather than inside Marlborough House.
Read
“Sometimes the Beefsteak Room, which could only seat at most thirty-six people, was too small; and at such times we migrated to the stage.”
“I remember the Prince saying that he had never seen a more lovely table.”
Evidence
Bram’s memoir documents the supper of 7 May 1883 and the Prince’s remark. The gold pen and pencil set rests on family recollection.
Marlborough House today
Marlborough House is now the headquarters of the Commonwealth Secretariat and Commonwealth Foundation. Its offices support cooperation between Commonwealth countries, and the house hosts diplomatic meetings, conferences and events.
Walk to the next stop Walk east along Pall Mall, then turn left into Angel Court. Follow the public passage through to St James’s Square and find the London Library at No. 14, on the west side of the square.
Marlborough House – Bram, Irving and the Prince of WalesPhotograph: Richard. Courtesy of the Bram Stoker Estate
Stop 10 of 15
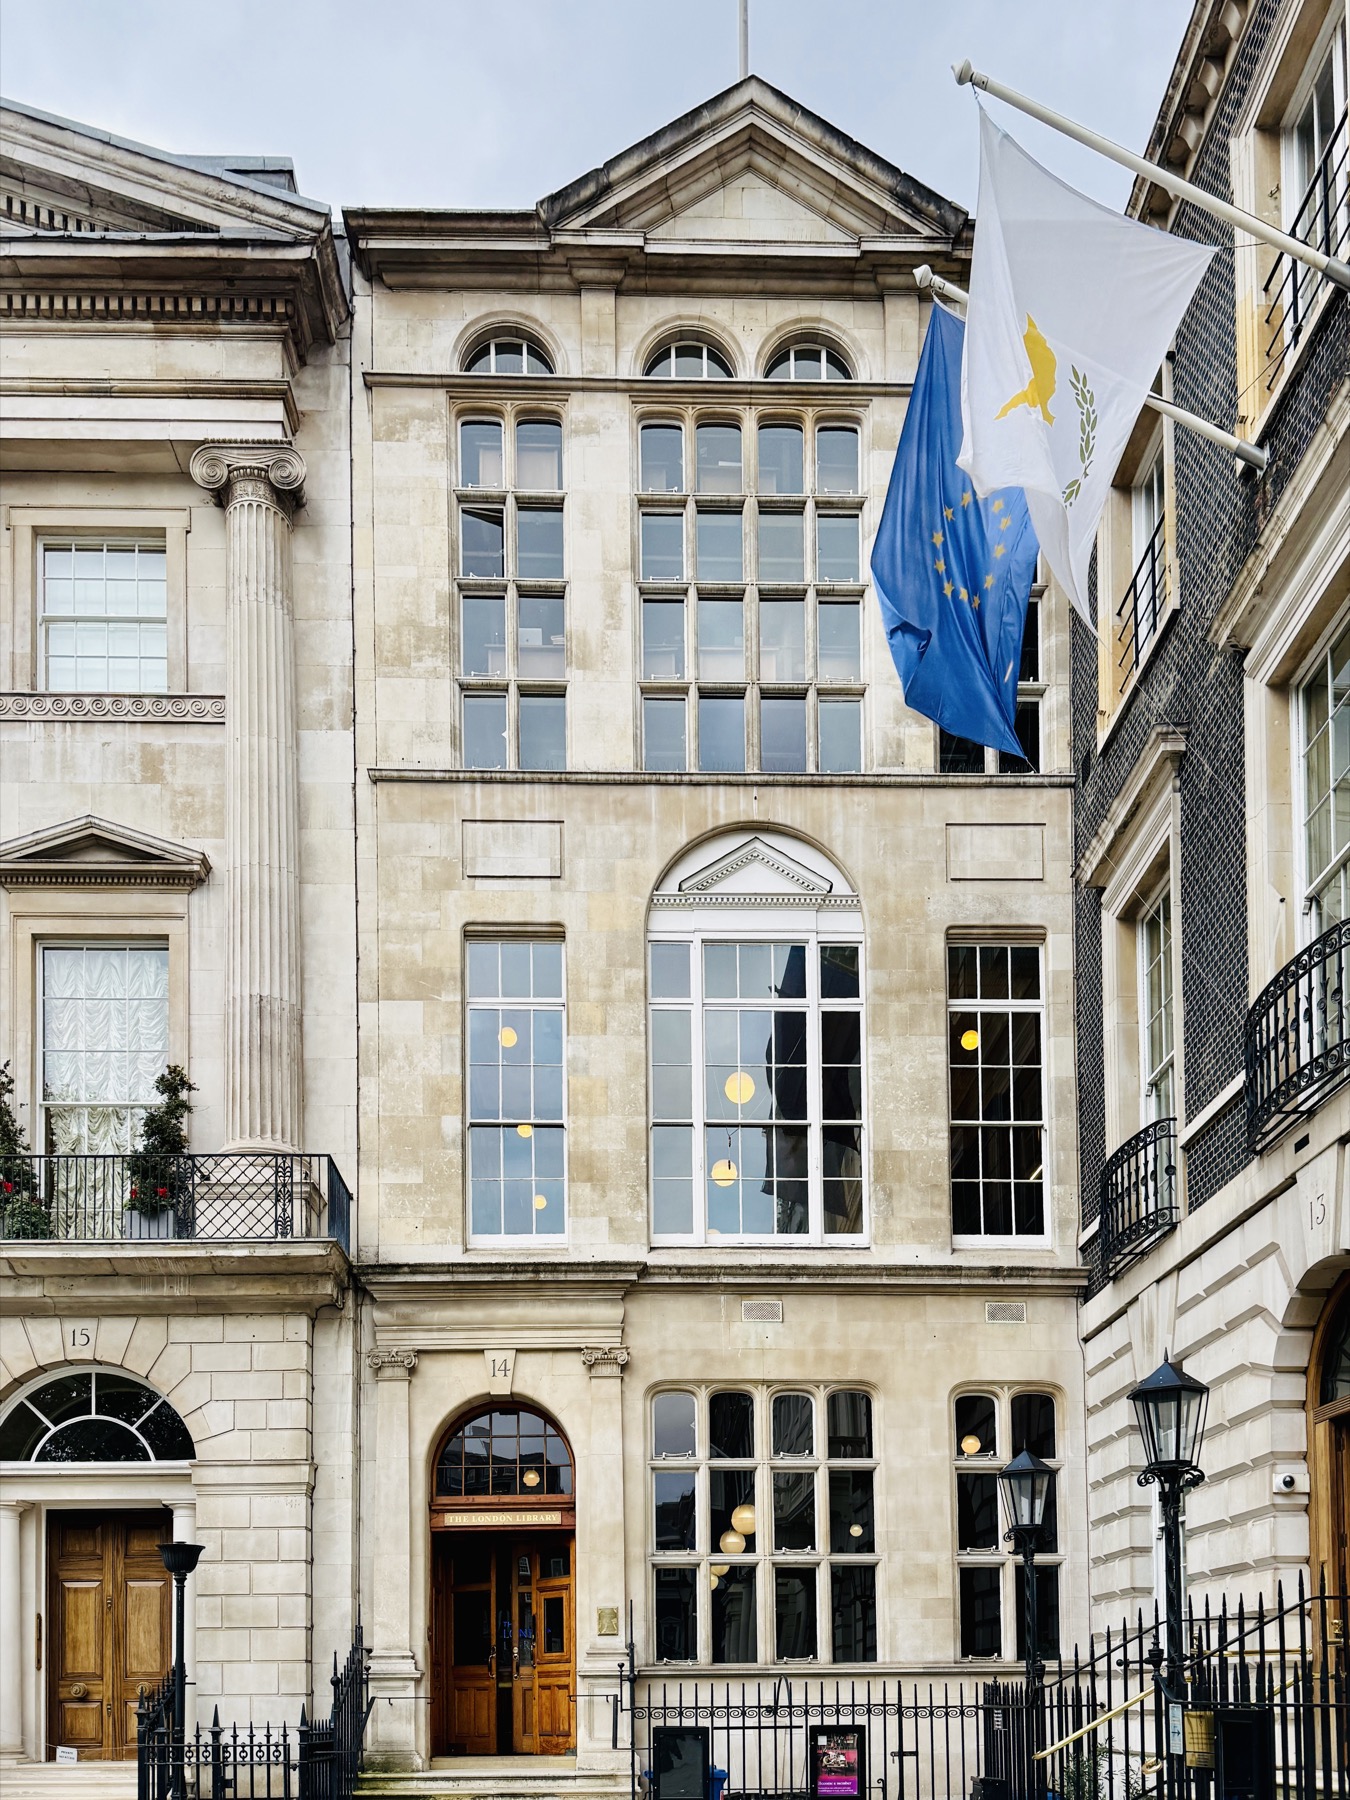
14 St James’s Square – The London Library
Dracula · Research visit · Library member · 1890–1897
At St James’s Square, we reach a place where Bram’s reading became part of his work. The London Library connects the working theatre manager with the patient research behind his fiction.
Look for No. 14 on St James’s Square. Bram was a member of the London Library from 1890 to 1897, the years in which he developed Dracula, and he read widely here in geography, travel and folklore.
Library researchers later compared marks in surviving volumes with Bram’s working notes for the novel. They identified 25 books whose markings match references in those notes, and six more with similar marks that the notes do not cite.
The stop shows a working habit as well as an imagination. Bram read, extracted details and organised his findings, much as Jonathan prepares for his own journey with books and maps in the library of the British Museum.
Look for
The Library’s entrance at No. 14. Picture Bram arriving with his notebook; the marked books themselves stay inside, in the collection he used.
Read
“I had visited the British Museum, and made search among the books and maps in the library regarding Transylvania”
Evidence
Membership from 1890 to 1897 is dated by the Library. The book attribution is the Library’s reasoned judgement: it calls the marks likely to be Bram’s, and no full borrowing record survives.
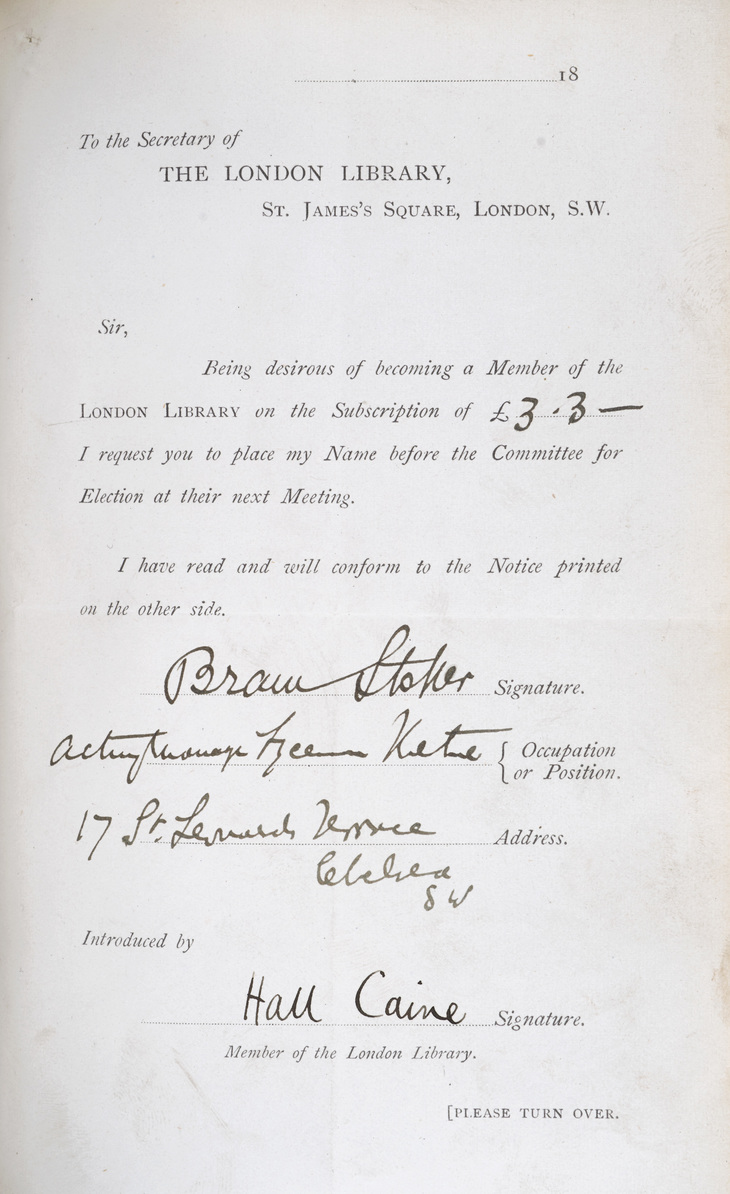
Hall Caine and Bram’s membership
Hall Caine introduced Bram to The London Library in 1890. His signature appears beneath the printed words “Introduced by” on Bram’s membership application. Seven years later, Bram dedicated Dracula to Caine as “my dear friend Hommy-Beg”, using Caine’s family nickname.
Bram Stoker’s application for membership of The London Library, 1890. The form records a subscription of £3 3s and bears Hall Caine’s signature under “Introduced by”.The London Library.
Practical information
Exterior visible from the square. Interior visits need a booked tour, event, day pass or membership.
Walk to the next stop Leave the square by Duke of York Street and turn right into Jermyn Street. Continue east to St James’s Market and follow the pedestrian lanes through to Norris Street. Cross Haymarket at the marked crossing and continue along Panton Street into Leicester Square. For optional stop A, Café Royal, take the separate detour shown on the map.
14 St James’s Square – The London LibraryPhotograph: Jessica. Courtesy of the Bram Stoker Estate
Optional A · Lunch or tea
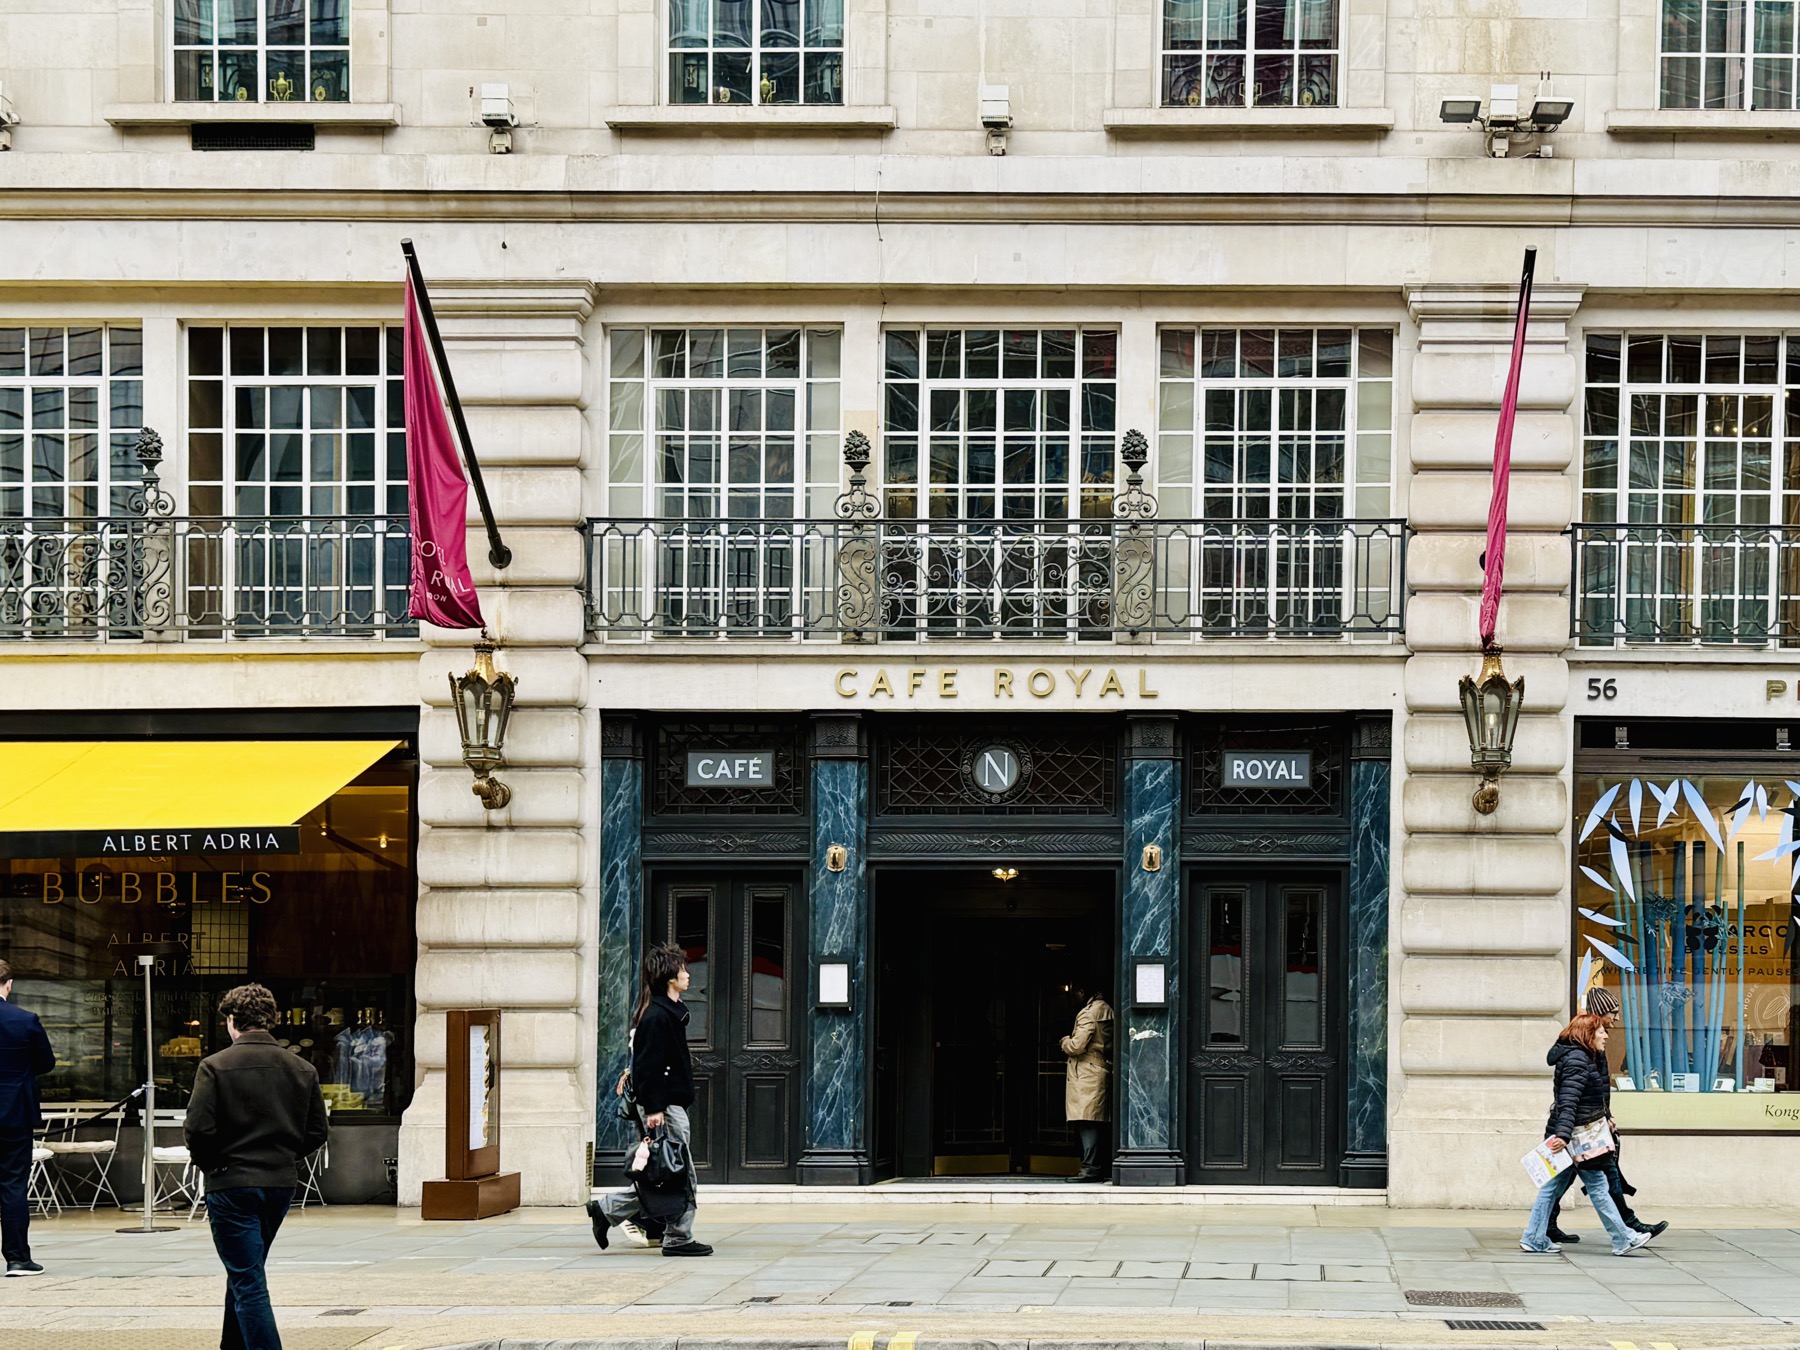
Café Royal – lunch or tea today, Bram’s supper in 1885
Dining · Supper with the Burtons · 27 June 1885
After the theatre came the prospect of a good supper and even better conversation. At Café Royal, the evening Bram recalled took an unexpectedly abrupt turn.
Stand on Regent Street outside Café Royal. On 27 June 1885, after a Lyceum performance of Olivia, Bram and Irving came here to sup with explorer Richard Burton and his wife Isabel, who had just arrived in London.
All four had hoped for a long evening, and Irving was longing to hear Burton speak of the death of his friend Edmund Henry Palmer three years earlier. The licensing rules intervened: punctually at midnight the party was turned out, and no protest or bribe could change it.
Today’s Hotel Café Royal serves afternoon tea in its historic Grill Room, and Sydney Starr’s painting At the Café Royal, of about 1890, evokes the period of Bram’s supper. Pause here for lunch or tea before rejoining the walk at Leicester Square.
Look for
The Café Royal name on Regent Street. If you go in, the Grill Room is where today’s afternoon tea is served.
Read
“The Burtons had just come to London and had asked Irving and me to take supper with them at the Café Royal after the play, Olivia.”
“Punctually at midnight we were inexorably turned out. Protests, cajoleries, or bribes were of no avail. Out we had to go!”
Evidence
Bram’s memoir records the date, the company and the midnight closing. It does not name the room, so today’s Grill Room evokes the period rather than marking their table.
Practical information
Optional and paid. Reserve ahead, or rest free in the garden of St James’s Square on a weekday (open until about 4.30 pm).
Rejoin the walk From the Library, follow the square to Duke of York Street, then Jermyn Street and Eagle Place to Piccadilly and Regent Street. Afterwards, go via Piccadilly Circus to Leicester Square and rejoin the main walk: about 0.8 km and 15–20 minutes’ walking in all.
Café Royal – lunch or tea today, Bram’s supper in 1885Photograph: Jessica. Courtesy of the Bram Stoker Estate
Stop 11 of 15
Leicester Square – Dracula on screen
Dracula · Victorian theatreland · Dracula on screen
Pause in Leicester Square, where the live entertainments of Bram’s London give way to the cinema crowds of today, and where the story he partly set in these streets still returns. In his years at the Lyceum, this was already a busy part of the West End’s theatrical world.
On the east side stood the Alhambra, an extravagantly decorated theatre and music hall, demolished in 1936 to make way for the Odeon. On the north side, the Empire opened in 1884 and became the Empire Theatre of Varieties in 1887. Ballet, variety acts and spectacular scenery drew audiences here while Bram was managing Irving’s business a short walk away. The Shakespeare statue in the garden dates from 1874, before Bram joined the Lyceum.
Around 1900, the Alhambra and Empire were known for music-hall acts, elaborate ballets and spectacular scenery. Moving pictures were already joining the live programmes: the Empire showed the Lumière brothers’ Cinematograph, while the Alhambra showed R. W. Paul’s films. The square was becoming a meeting place for stage entertainment and the new cinema during Bram’s lifetime; no specific visit by him to these venues is established.
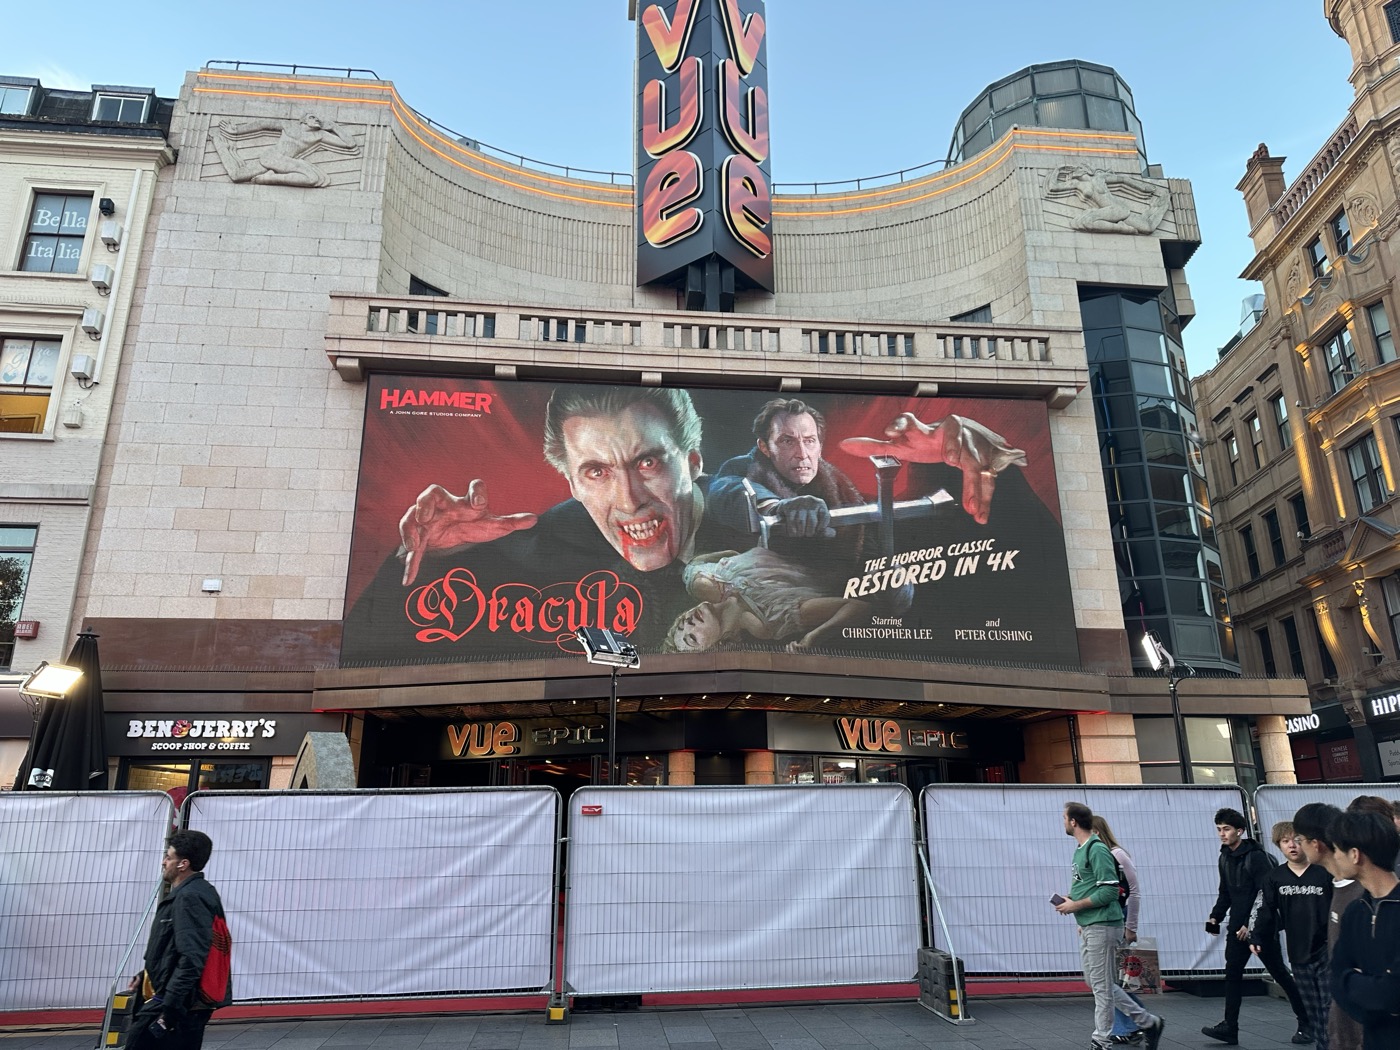
Leicester Square has been home to many Dracula-related premieres, long after Bram’s death in 1912. Recent ones include: Dracula Untold in 2014, Robert Eggers’s Nosferatu in 2024, and the restored version of Hammer’s Dracula in 2026.
The photograph shows the Vue at the Hammer launch on 5 October 2026. Christopher Lee’s Count and Peter Cushing’s Van Helsing fill the billboard for the new 4K restoration. More than a century after Bram’s death, his novel was once again bringing an audience into Leicester Square. From here, continue to Henry Irving’s statue and return to the actor at the centre of Bram’s working life.
Look for
Shakespeare’s statue in the central garden, the cinema frontages around the square, and the Vue frontage shown in Richard’s photographs of Hammer’s restoration launch.
Evidence
Historic England dates the Shakespeare fountain to 1874 and records the Empire’s opening in 1884 and renaming in 1887. London Museum documents the Alhambra and its replacement by the Odeon. Contemporary premiere reports and Reuters coverage establish the three modern launches listed here. No specific visit by Bram to these venues is claimed.
Practical information
A public-square stop. Keep entrances and pedestrian routes clear, particularly during premieres. The photographs show the temporary display on 5 October 2026.
Walk to the next stop Leave the square at its south-east corner and head towards Charing Cross Road. Turn south towards the National Portrait Gallery. Henry Irving’s statue stands beside the gallery, opposite the Garrick Theatre.
Vue Leicester Square displaying Dracula, restored in 4K, on 5 October 2026.Photograph: Richard. Courtesy of the Bram Stoker Estate
Stop 12 of 15
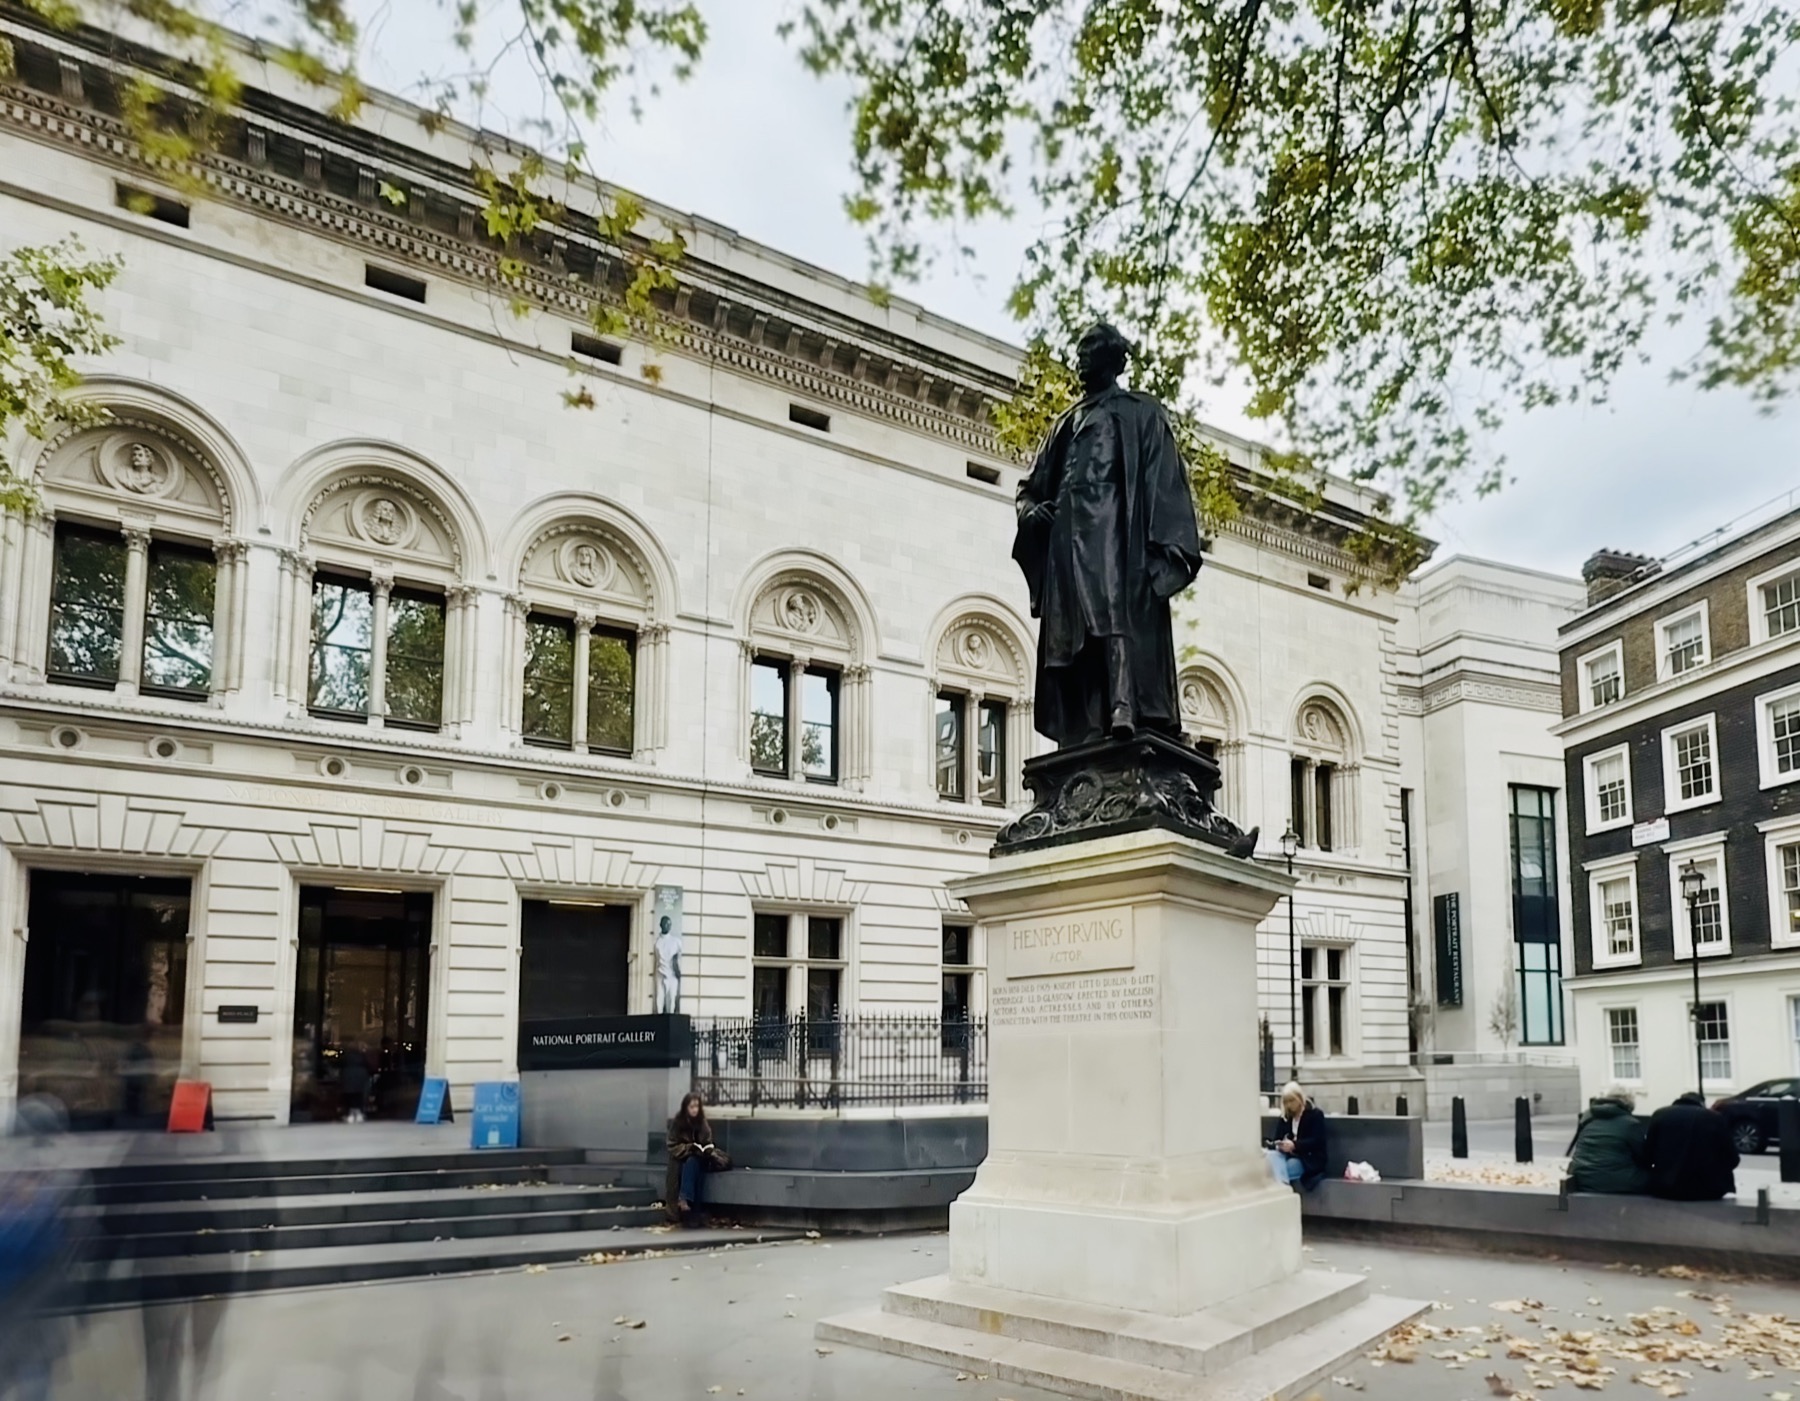
Henry Irving statue – Charing Cross Road
Friends · Later memorial · Thomas Brock’s bronze · 1910
From the cinemas of Leicester Square, return to the theatre world at Henry Irving’s statue. For 27 years, Bram organised the business behind Irving’s performances and tours.
Look up at Thomas Brock’s bronze of Henry Irving, raised here in 1910. Irving was the centre of Bram’s working life: from 1878 Bram managed the business of Irving’s Lyceum company, organising its seasons, correspondence and tours, and he stayed at the actor’s side until Irving’s death in 1905.
Irving was buried in Westminster Abbey, and Bram described the silent crowds at the funeral as a tribute without equal. The next year he published Personal Reminiscences of Henry Irving (1906), his two-volume account of their long partnership.
In its preface Bram wrote that sculptors and painters could record a man’s outward appearance, while his own book would show the friend he knew. Brock’s statue supplied that outward likeness five years after Irving’s death, while Bram was still living.
A contemporary feature in The Strand Magazine in January 1891 shows Irving at four ages, with portraits labelled 29, 30, 39 and 42. Its brief commentary describes changes in his appearance and says he supplied photographs for the feature. This is a view of Irving during his partnership with Bram, before the later memorial.
Look for
Irving’s name on the plinth beside the National Portrait Gallery, and the bronze figure above it: the record of “external appearance” that Bram’s preface leaves to the sculptor.
Read
“Of him the other arts can make record in so far as external appearance goes.”
“For my own part the work which I have undertaken in this book is to show future minds something of Henry Irving as he was to me.”
“Never in the world was greater tribute to any man.”
Evidence
Brock’s statue was erected in 1910, during Bram’s lifetime. The partnership it recalls, and the funeral, are documented in Bram’s own memoir of 1906.
Practical information
View from the pavement; use marked crossings and leave room for passers-by.
Walk to the next stop Continue south along Charing Cross Road and St Martin’s Place, past St Martin-in-the-Fields. Turn towards Adelaide Street and find the Oscar Wilde memorial: a bench with a sculpted head at one end.
Henry Irving statue – Charing Cross RoadPhotograph: Jessica. Courtesy of the Bram Stoker Estate
Stop 13 of 15
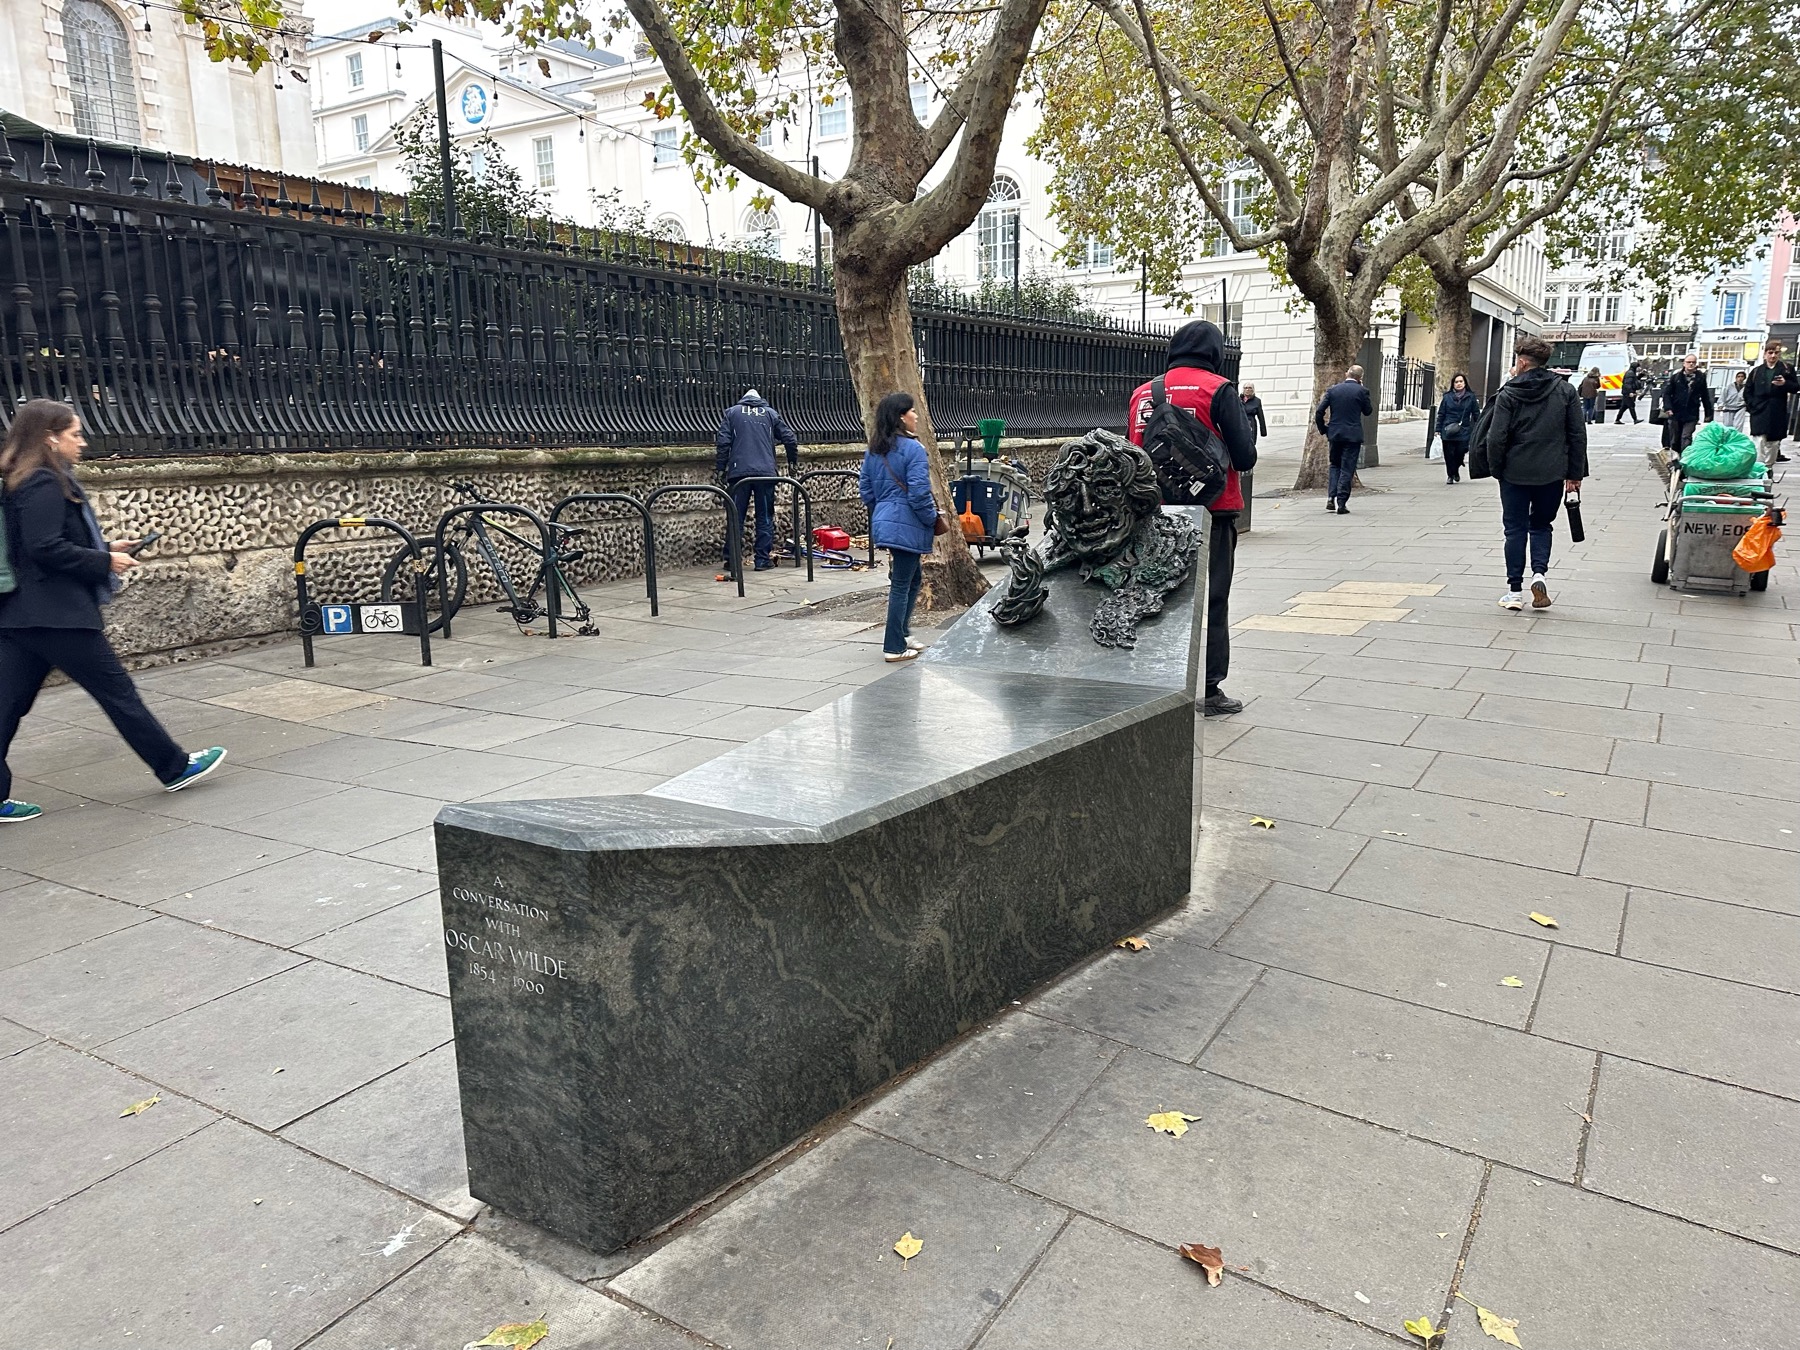
Oscar Wilde – Florence, Bram and a family friendship
Friends · Later memorial · Maggi Hambling’s memorial · 1998
Oscar Wilde’s memorial brings us back to the friendships encountered at Tite Street. By now we are close to the Strand and the centre of Bram’s working London.
Maggi Hambling’s A Conversation with Oscar Wilde was unveiled here on 30 November 1998. Oscar’s bronze head and hand rise from a green granite memorial that doubles as a bench, inviting visitors to sit beside him.
Before she married Bram, Florence Balcombe was courted by Oscar, who in September 1876 gave her a watercolour view from Moytura House, the Wilde family’s retreat beside Lough Corrib, inscribed for “Florrie”. Florence married Bram at St Ann’s Church, Dublin, on 4 December 1878, and they moved to London as he began work with Irving.
An undated note in the Shakespeare Birthplace Trust’s Lyceum Collection begins “My Dear Bram”. Constance is unwell and resting in Brighton for ten days, so Oscar will come to supper alone. The note preserves a later friendship alongside the earlier courtship remembered through Florence’s watercolour.
Look for
Oscar’s bronze figure, cigarette in hand, rising from a green granite coffin that doubles as a bench. Along the top runs his line “we are all in the gutter, but some of us are looking at the stars”.
Evidence
A modern memorial: no meeting of the Stokers and Wildes is recorded here. The watercolour and the supper note survive; the note, in the Shakespeare Birthplace Trust’s Lyceum Collection, is undated.
Practical information
Outdoor memorial on Adelaide Street. View from the pedestrian space and keep the pavement clear.
Walk to the next stop Follow Adelaide Street east towards the Strand, then turn left onto the north-side pavement. Continue to Coutts at No. 440 and look for its sign. Keep the bank entrance clear.
Oscar Wilde – Florence, Bram and a family friendshipPhotograph: Richard. Courtesy of the Bram Stoker Estate
Stop 14 of 15
Coutts – Bram’s bank and the Count’s letter
Bank · Bram’s bank · 59 Strand until 1904; 440 Strand from 1904
Even the undead need a bank. Bram banked with Coutts, and in the novel the Count writes to the same bank, so the name links Bram’s everyday affairs with the practical machinery of Dracula. The bank had two successive homes on opposite sides of the Strand.
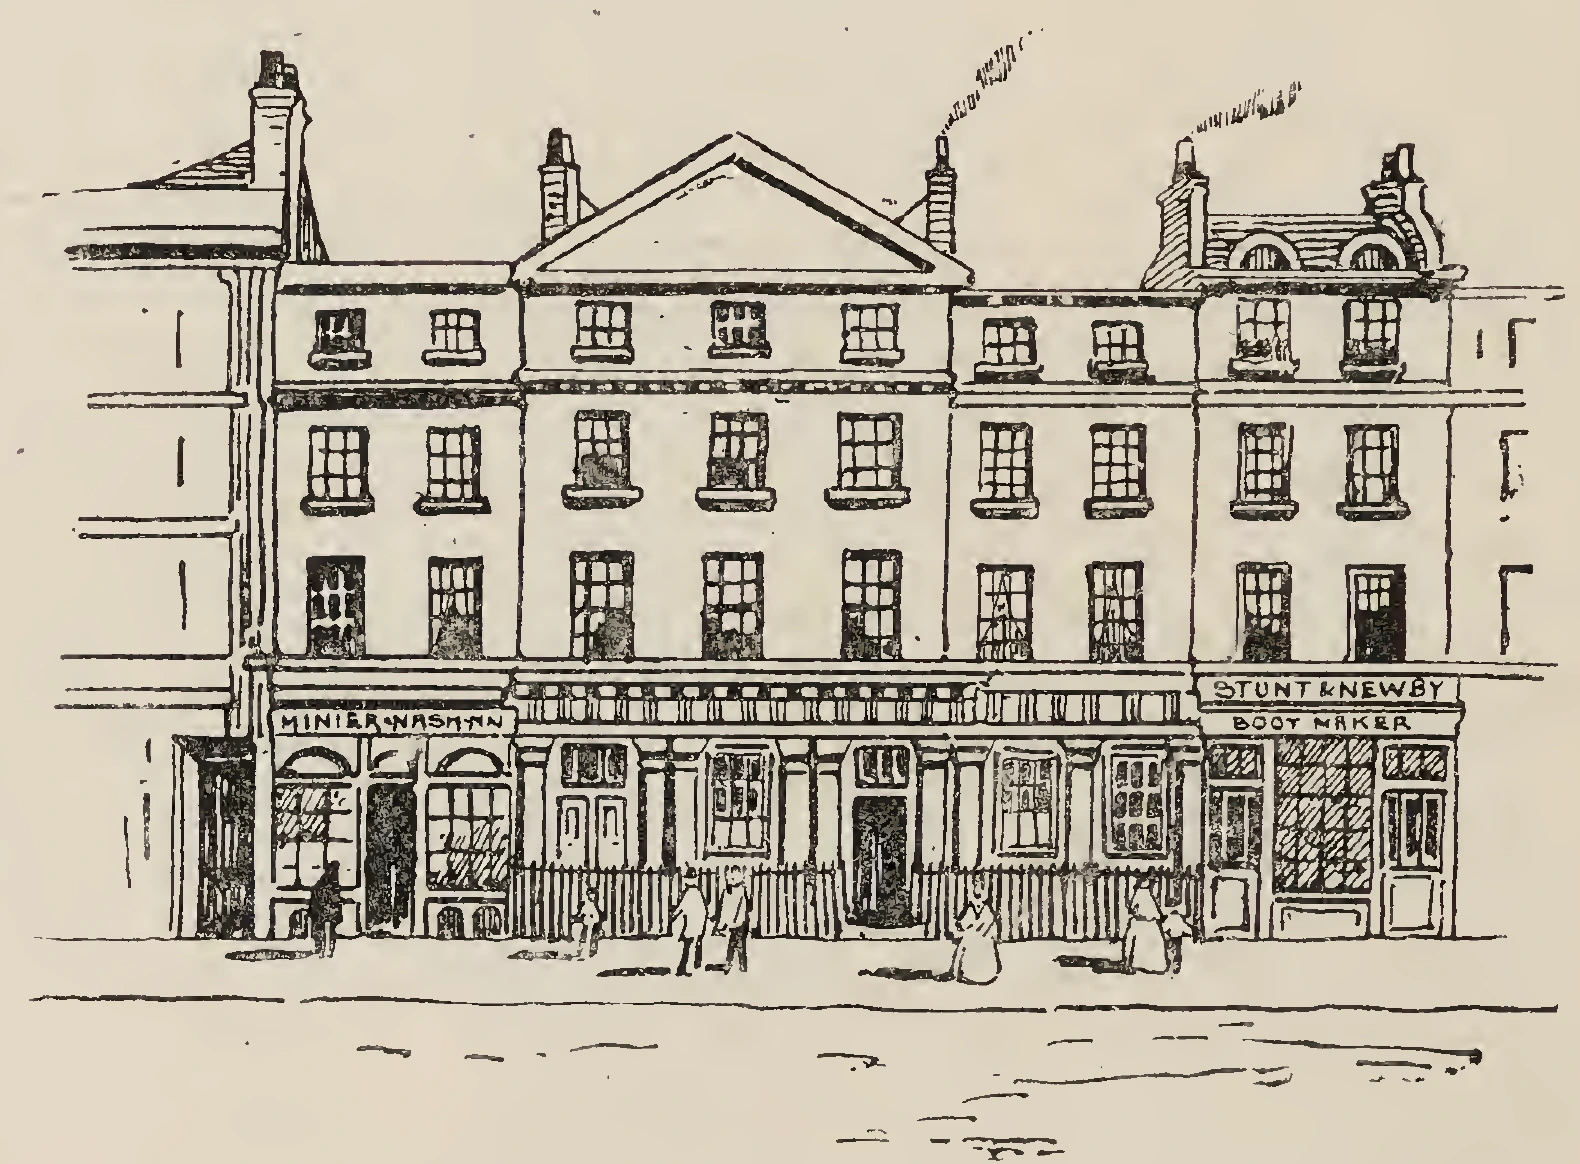
Look for the Coutts name at 440 Strand, on the north side. Bram became a Coutts client in 1881, according to the bank’s archivist, Tracey Earl. He would have known its earlier premises at 59 Strand, farther east on the south side, as well as 440 Strand, where the bank moved in 1904. Tracey confirms that the former building can still be recognised at No. 59, although its façade was altered in 1924 and repaired after the Second World War.
The illustration shows Coutts’ banking house in 1853, from a drawing by T. Hosmer Shepherd, reproduced on page 10 of The Strand Magazine in January 1891. It records the earlier frontage, rather than today’s appearance.
In Chapter 3 the Count leaves his newly written letters face down on a table at the castle, and Jonathan turns them over: one to Whitby, one to Varna, one to Coutts & Co., London, and one to bankers in Buda-Pesth. The Count’s London plans pass through a real bank on this street.
Coutts appears in Bram’s own memoir too. Describing Richard Burton’s Arabian Nights, he notes that subscribers paid in full and directly to Coutts and Co., so there were no fees or discounts.
Coutts holds four brief instructions from Bram: an order from the Columbia Theatre, Chicago, on 12 October 1893 for three monthly payments over five months; a slip from 18 St Leonard’s Terrace on 25 August 1896 arranging Florence’s Wimbledon Ladies’ Golf Club subscription from January 1897; a Lyceum instruction of 6 January 1897 about the end of an Arts Club subscription; and a Lyceum instruction of 28 December 1897 stopping London Library subscription payments because he was ceasing membership after that year.
Look for
The Coutts name at 440 Strand on the north side, then the former banking house at 59 Strand farther east on the south side. Compare Shepherd’s historical illustration with the altered frontage; the archivist dates alterations to 1924 and repairs after the Second World War.
Read
“One of the letters was directed to Samuel F. Billington, No. 7, The Crescent, Whitby, another to Herr Leutner, Varna; the third was to Coutts & Co., London, and the fourth to Herren Klopstock & Billreuth, bankers, Buda-Pesth.”
“The entire edition was subscribed, the amounts being paid in full and direct to Coutts and Co., so that there were no fees or discounts.”
Evidence
Coutts has confirmed the details. The novel names the bank but does not establish whether the fictional Count had an account there.
Practical information
Exterior stop only. Please keep the bank entrance clear.
Walk to the next stop Continue east along the north side of the Strand, looking across towards the former No. 59 address area on the opposite side. Pass the Savoy on your right; optional stop B is reached by a marked crossing into Savoy Court. Turn left into Burleigh Street, then right into Exeter Street. Continue to the Lyceum’s portico at the Wellington Street corner.
Coutts’ banking house at 59 Strand in 1853, from a drawing by T. Hosmer Shepherd. Reproduced in The Strand Magazine, January 1891, p. 10.Courtesy of the Bram Stoker Estate
Optional B · Lunch or tea
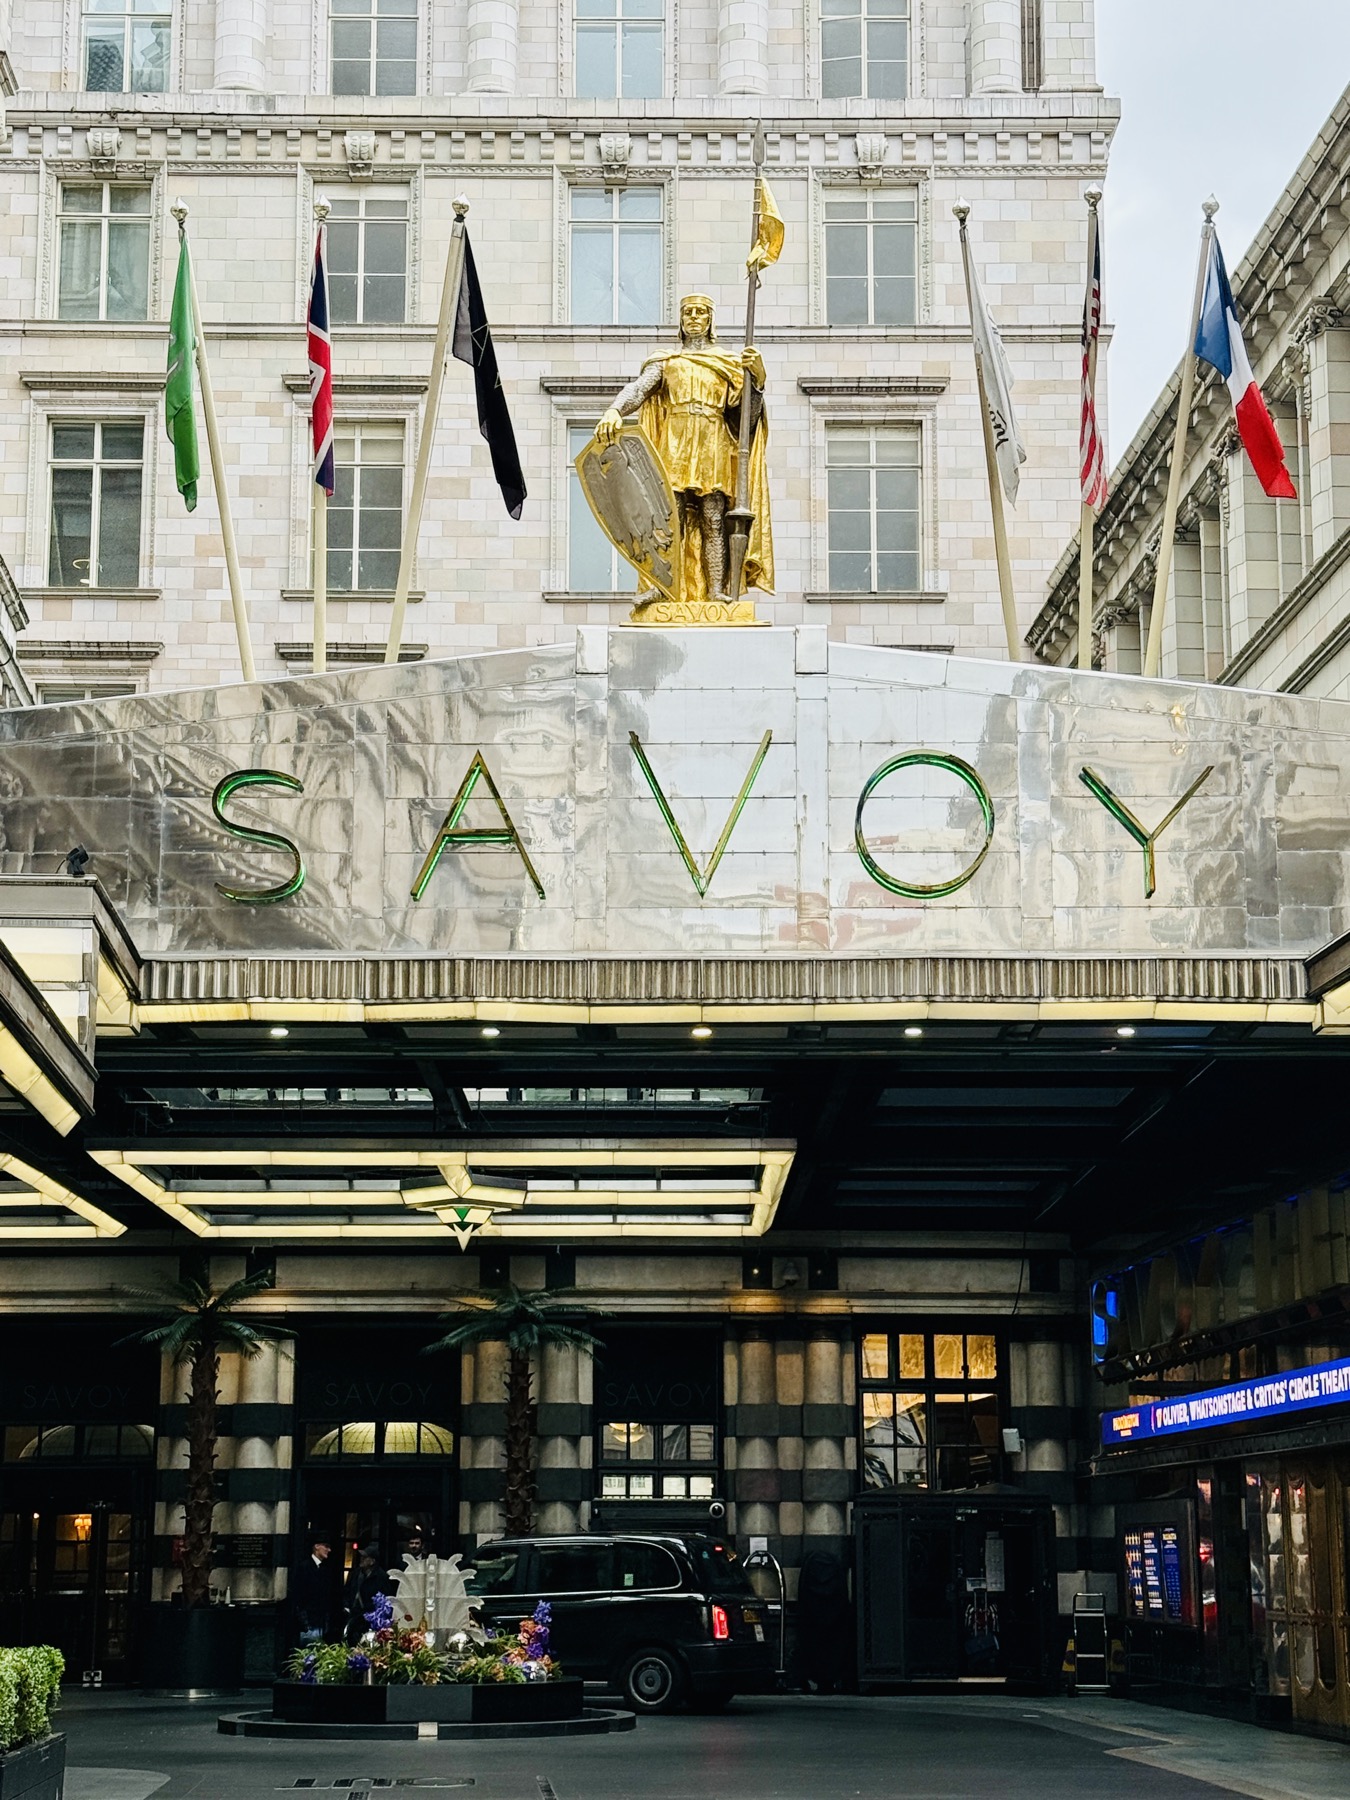
The Savoy – supper, poetry and tears
Dining · Irving’s dinner for James Whitcomb Riley · 29 July 1891
A grand hotel makes a surprisingly intimate setting for this stop. The story Bram preserved is about a dinner party whose composure could not survive a poem.
Step into Savoy Court and look up at the hotel. On 29 July 1891 Irving gave a dinner here for the American poet James Whitcomb Riley, whom his friends called “Jamesy”. Riley recited several of his poems, and “Good-bye, Jim” moved every other man at the table to tears.
The hotel grew out of the theatre next door: Richard D’Oyly Carte opened the Savoy Theatre in 1881 for the Gilbert and Sullivan operas, and their success helped make the hotel possible in 1889.
The partnership touched the Stokers’ own circle, for W. S. Gilbert knew the family, especially Florence, while Arthur Sullivan composed music for Irving’s Macbeth at the Lyceum. Pause here for lunch or tea before the last stop on the walk.
Look for
The forecourt of Savoy Court and the hotel entrance. Thomas E. Collcutt’s additions, published in 1897, belong to the Savoy of Bram’s lifetime.
Read
“His rendering of the powerful little poem, “Good-bye, Jim,” made every one of the other eight men at the table weep.”
Evidence
Bram’s memoir records the date, the host and the recitation, but not the room. The 1897 illustration of Collcutt’s additions records the building, not this dinner.
Practical information
Optional and paid. Book ahead, or rest free in Victoria Embankment Gardens beside the Savoy.
Rejoin the walk Leave the main route at the marked Strand crossing for the short spur into Savoy Court. Watch for vehicles in the forecourt. Afterwards, return to the same crossing and rejoin the red route to the Lyceum.
The Savoy – supper, poetry and tearsPhotograph: Jessica. Courtesy of the Bram Stoker Estate
Stop 15 of 15
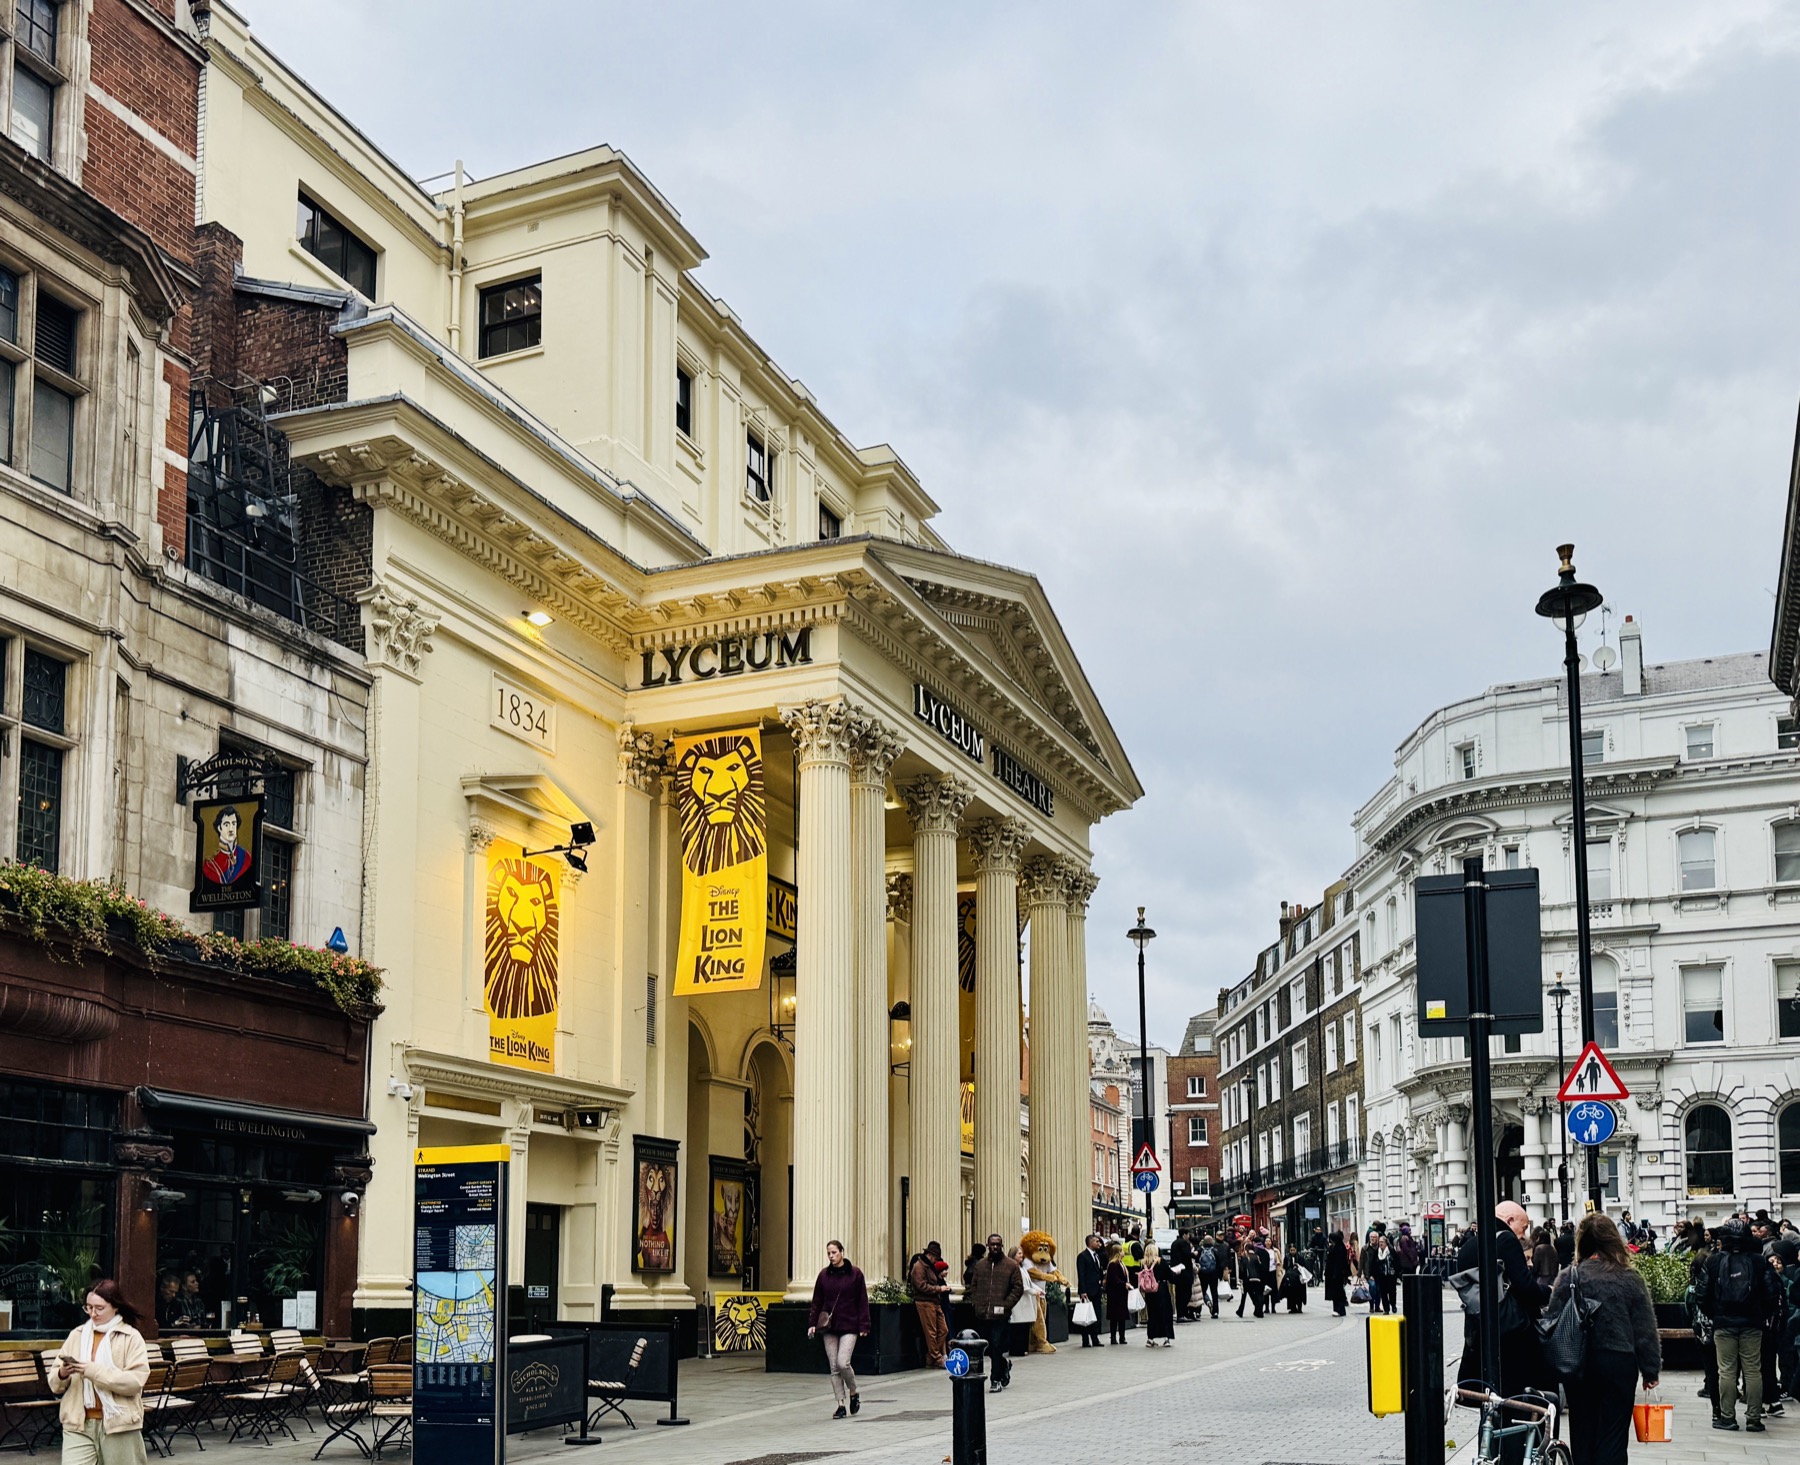
Lyceum Theatre – Wellington Street
Work · Bram and Irving · 1878–1905; Lyceum company to 1902
Our walk ends where Bram’s working day began: at the Lyceum, where Bram organised the work behind Henry Irving and Ellen Terry’s performances. The theatre was the centre of a partnership that lasted 27 years, from 1878 to Irving’s death in 1905.
Look across Wellington Street at Samuel Beazley’s portico. In 1878 Irving took the Lyceum into his own hands and asked Bram to leave the Civil Service and run his business; Bram accepted at once, and remained his manager until Irving’s death in 1905.
Behind the performances in which Irving and Ellen Terry starred, Bram organised accounts, correspondence, tours and hospitality. On 18 May 1897 he arranged the copyright reading of Dracula; or, The Un-Dead here, eight days before the novel’s publication.
The Beefsteak Room was the heart of that hospitality, where Irving entertained after performances and talk could last all night. One evening, which Bram thought was in February 1887, the two men supped alone and discussed Macbeth until dawn; Bram believed the talk helped Irving decide to revive the play.
Dracula returned here in 1939. Hamilton Deane, who had joined Irving’s company in 1899, transferred his licensed stage adaptation from the Winter Garden to the Lyceum, where he played the Count from 25 April to 13 May. Forty-two years after Bram’s copyright reading, the commercial play reached his old theatre in the year it closed.
Look for
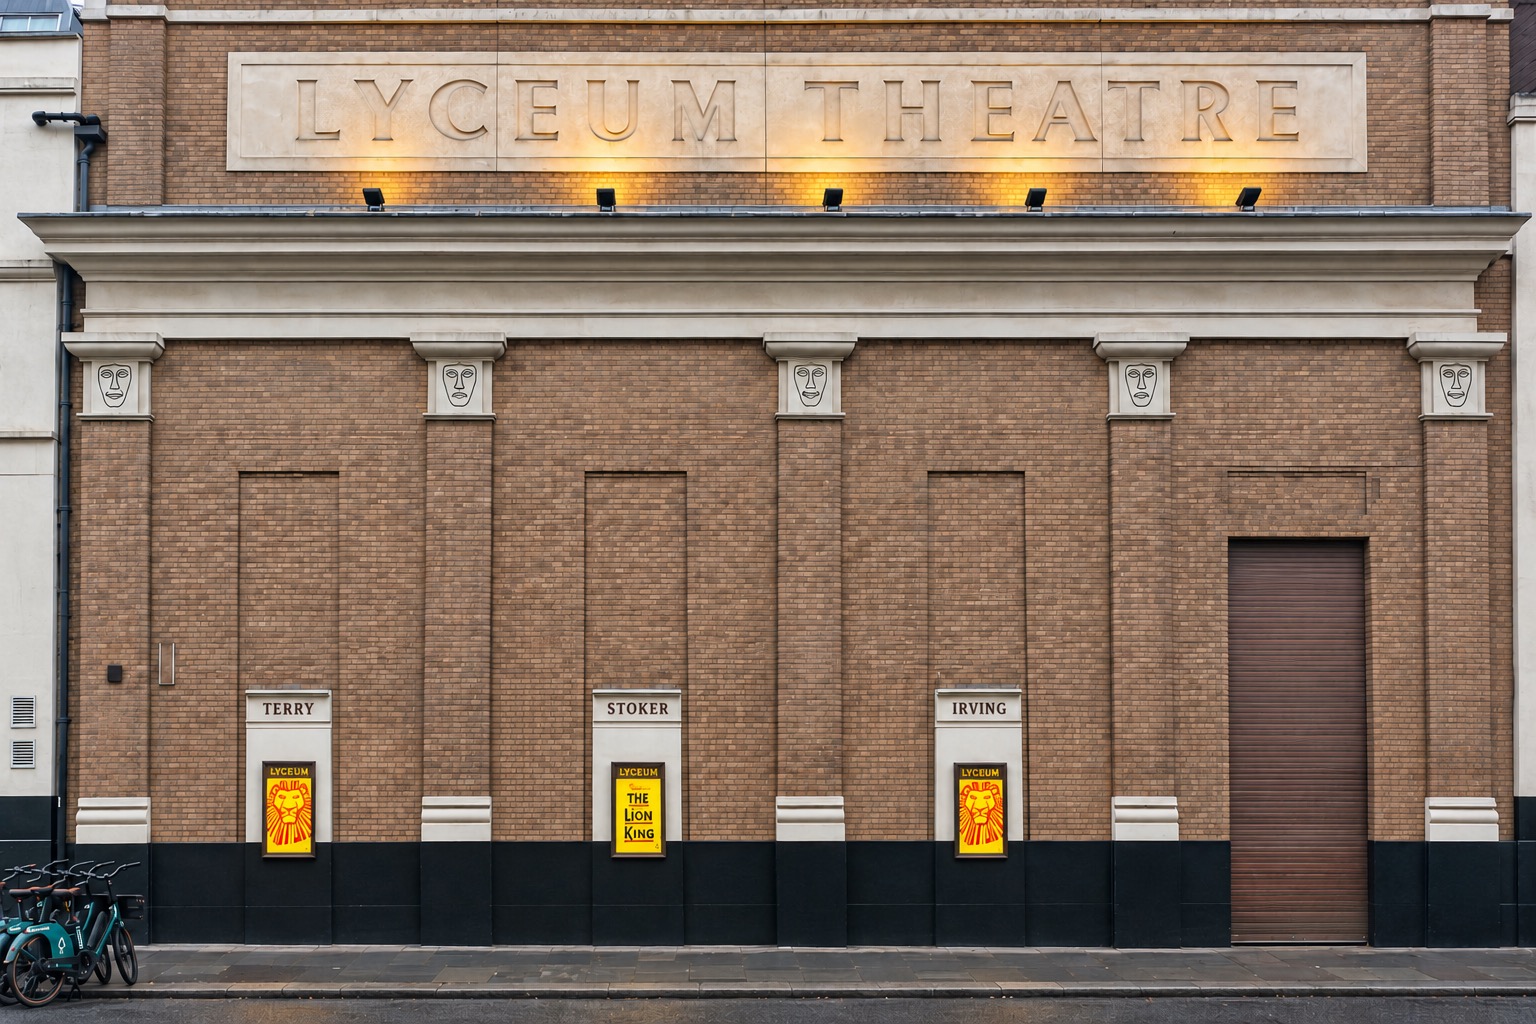
Beazley’s nineteenth-century portico. Then walk round to Burleigh Street for the names Terry, Stoker and Irving on the rear wall, later commemorations of Ellen Terry, Bram Stoker and Henry Irving.
Read
“He asked me if I would give up the Civil Service and join him; I to take charge of his business as Acting Manager. I accepted at once.”
“having supped alone in the Beefsteak Room, talked over the play till the windows began to show their edges brightening in the coming day”
Evidence
Bram managed Irving’s business from 1878 to 1905; the Lyceum company’s tenancy ended in 1902. Historic England distinguishes Beazley’s surviving frontage from Bertie Crewe’s later auditorium. The Beefsteak Room’s survival is not established.
Practical information
View the portico from the public pavement on Wellington Street. The modern auditorium and Burleigh Street commemorations belong to later phases of the building. For admission, check current performances with the theatre.
The main walk ends at the Lyceum’s Wellington Street portico, where Bram worked for Irving. For a final optional break, continue around the corner to C, Ole & Steen at 351–353 Strand. To go inside the theatre, book a performance through its official ticketing.
Lyceum Theatre – Wellington StreetPhotograph: Jessica. Courtesy of the Bram Stoker EstateTerry, Stoker and Irving names on the Lyceum’s Burleigh Street wall.Photograph: Richard. Courtesy of the Bram Stoker Estate · AI edited: straightened and cropped; parking sign removed.
Optional C · Lunch or tea
351–353 Strand – Ole & Steen – tea at the end of the walk
Dracula · A modern bakery break · Dracula, Chapter 20
Finish the walk with a cup of tea around the corner from the Lyceum, recalling Jonathan Harker’s pause at an ABC tea shop.
Ole & Steen’s Strand bakery is at 351–353 Strand, close to Wellington Street and the Lyceum. After following Bram from Chelsea to the theatre, this is an optional place to rest over tea, coffee or something to eat.
In Chapter 20, Jonathan has traced the Count’s Piccadilly house and questioned the estate agents Mitchell, Sons & Candy in Sackville Street. Darkness has fallen and he is tired and hungry: he takes a cup of tea at an Aërated Bread Company shop before catching the train back to Purfleet. The novel does not identify that shop; this modern bakery provides an echo of his break.
The Aërated Bread Company was incorporated in London in 1862. Despite the diaeresis – the two dots over the ë – its name was not Scandinavian. It described bread raised by forcing carbon dioxide into dough. ABC’s affordable tea shops became a familiar part of London life.
Look for
The Ole & Steen shop at 351–353 Strand, on the north side near Wellington Street.
Read
“It was now dark, and I was tired and hungry. I got a cup of tea at the Aërated Bread Company and came down to Purfleet by the next train.”
Evidence
Dracula names the Aërated Bread Company but does not identify Jonathan’s branch; this is a modern refreshment stop after the Lyceum.
Practical information
Optional and paid. Check the Strand branch’s current opening hours and menu before visiting.
Walk to the bakery From the Lyceum’s Wellington Street portico, walk to the Strand and follow the north-side pavement to Ole & Steen at 351–353. It is a short walk around the corner. This optional stop finishes the trip.
Finish:
Finish here with an optional drink or something to eat.
From the riverside house in Cheyne Walk to the Lyceum’s portico, you have followed the outline of Bram’s London: the homes where he lived and wrote, the bank that kept his money, the friends he visited and dined with, and the streets he lent to his Count. Dracula was first read aloud on this stage in May 1897, eight days before publication, and it has travelled further than anything else Bram made.
London more to explore
Golders Green – Bram’s ashes
Bram’s remains are at Golders Green Crematorium, 62 Hoop Lane, London NW11 7NL. This is a separate biographical visit, not a setting in Dracula. The operator requires an appointment to visit Bram’s memorial in the columbaria; check its current arrangements before travelling.
Hampstead and the Heath – Lucy’s fictional landscape
The novel places the Bloofer Lady reports around Hampstead Heath and names Lucy’s churchyard Kingstead. Hillingham and Kingstead are fictional locations: this extension explores the wider landscape, not a confirmed house or tomb. Read chapters 13–16.
Highgate Cemetery is a separate Gothic and cultural-history visit. It is not named as Lucy’s churchyard in the novel, and the later Highgate Vampire story must not be confused with Stoker’s text. Admission is paid; guided tours are optional. Book admission or a tour through the Cemetery’s official website.
Spitalfields and Mile End New Town – Chicksand Street
In chapter 20, six earth-boxes are delivered to 197 Chicksand Street, Mile End New Town. Explore the Chicksand Street area as an optional outing; the novel’s house has not been matched to a surviving doorway.
Another six boxes go to Jamaica Lane, Bermondsey. The novel’s Jamaica Lane has no securely identified modern address. This is a separate district extension, not a mapped extra leg.
Jonathan Harker consults books and maps at the British Museum before his journey; Van Helsing later researches there too. This is a fictional research connection distinct from Bram’s London Library membership. The historical Reading Room is at the British Museum, not the present British Library. Advance booking for free Museum entry is recommended. Check current Reading Room access before travelling; the entry booking is for the Museum.
The escaped wolf episode gives London Zoo a direct place in the novel’s London geography. Stoker’s fictional wolf Bersicker escapes from the Zoo and later breaks through Lucy’s bedroom window. A visit inside today’s Zoo requires admission. Book online for the best-value tickets, or check the current gate arrangements.
Chapter 9 names the Great Eastern Hotel when Van Helsing asks Seward to arrange rooms. This makes a worthwhile separate railway-and-hotel outing, distinct from his Berkeley Hotel base in the West End. The central walk does not extend to Liverpool Street.
Seward’s Chapter 9 letter arranges to meet Lucy at “the Stores”. Gill Davies identifies this as Harrods. The novel does not name Harrods, so this remains an attributed reading rather than a confirmed shop address. Consider it an optional literary question if visiting Knightsbridge, not an extra stop on the main route.
Gill Davies’s March 2004 essay connects the novel’s London locations with wealth, transport, empire and Victorian anxieties about outsiders. Its map is an interpretation to compare with the novel, not proof of every proposed site.
Optional detour from the Berkeley Hotel: Arthur Holmwood writes from the Albemarle Hotel on 31 August, asking Dr Seward to help Lucy. This Chapter 9 letter begins the chain that brings Van Helsing into her care.
Optional detour from the Berkeley Hotel: In Chapter 20, Jonathan visits the estate agents Mitchell, Sons & Candy in Sackville Street to discover who bought the Piccadilly mansion.